はじめに
- やりたいこと
- Amazon EventBridgeでWebhook捕捉、WebhookからLambda実行、LambdaでShopify Admin APIを呼び出したい
- 参考
- https://shopify.dev/docs/apps/build/authentication-authorization/access-tokens
- 2種類のアクセストークン取得方法
- 埋め込みアプリは、Token Exchange
- 非埋込アプリは、Authorization grant code flow
- 2種類のアクセストークン取得方法
- https://shopify.dev/docs/apps/build/authentication-authorization/access-tokens/authorization-code-grant
- マニュアルでのAuthorization code grant flow
- https://shopify.dev/docs/apps/build/authentication-authorization/access-tokens/token-exchange
- Token Exchange
- https://shopify.dev/docs/apps/build/authentication-authorization/access-tokens/offline-access-tokens
- オフライントークンとは
- デフォルトのアクセスモード
- ユーザーインタラクションのない長期的なアクセスに使用
- Webhookへの応答やメンテナンス作業などのバックグラウンド作業に向いている
- オフライントークンとは
- https://shopify.dev/docs/apps/build/authentication-authorization/access-tokens/online-access-tokens
- オンライントークンとは
- 明示的に要求する必要がある
- ストアの個々のユーザーに紐づけられている
- ユーザーのウェブでのセッションの時間がトークンの生存時間となる
- オンライントークンとは
- https://shopify.dev/docs/apps/build/authentication-authorization/access-tokens
Authorization code grant flowによるアクセストークンの取得
- Shopifyパートナー画面の対象アプリのAllowed redirection URL(s)にlocalhost:3000を追加する
- Shopifyパートナー画面の対象アプリのclient idをセットする
- 以下のシェルを実行する
export shop=s3labteststore2
export client_id=<Your client id>
export redirect_uri=http://localhost:3000
export scope=read_customers,read_orders,read_products,write_orders,write_products

open https://${shop}.myshopify.com/admin/oauth/authorize?client_id=${client_id}\&scope=${scope}\&redirect_uri=${redirect_uri}- ブラウザが開き、リダイレクトされたURLからcodeの値を取得する
http://localhost:3000/
?code=xxxxx
&hmac=yyyyy
&host=zzzzz
&shop=s3labteststore2.myshopify.com
×tamp=1722774742- Shopifyパートナー画面の対象アプリのclient idをセットする
- Shopifyパートナー画面の対象アプリのclient secretをセットする
- codeをセットする
- 以下のシェルを実行する
export shop=s3labteststore2
export client_id=<Your client id>
export client_secret=<your client secret>
export auth_code=<your authorization code>

curl -X POST https://${shop}.myshopify.com/admin/oauth/access_token \
  -d "client_id=${client_id}" \
  -d "client_secret=${client_secret}" \
-d "code=${auth_code}" - 以下のように、access_tokenを取得できる
% {"access_token":"xxxxx","scope":"read_customers,write_orders,write_products"}- access_tokenをセットする
- 以下のシェルを実行する
export shop=s3labteststore2
export access_token=xxxxx

curl -X GET \
  https://${shop}.myshopify.com/admin/api/2024-07/orders.json \
  -H "Content-Type: application/json" \
-H "X-Shopify-Access-Token: ${access_token}"- APIのレスポンスが取得できることを確認する
{
  "orders": [
    {
      "id": 5848152735973,
      "admin_graphql_api_id": "gid://shopify/Order/5848152735973",
      "app_id": 580111,
      "browser_ip": "153.160.126.107",
      "buyer_accepts_marketing": true,
      "cancel_reason": null,
      "cancelled_at": null,
      "cart_token": "xxx",
      "checkout_id": 36152385110245,
      "checkout_token": "yyy",
      "client_details": {
        "accept_language": "en-JP",
        "browser_height": null,
        "browser_ip": "zzz",
        "browser_width": null,
        "session_hash": null,
        "user_agent": "Mozilla/5.0 (Macintosh; Intel Mac OS X 10_15_7) AppleWebKit/537.36 (KHTML, like Gecko) Chrome/126.0.0.0 Safari/537.36"
      },
・・・- API Access > Access Request > Protected customer data access
- APIが「{“errors”:”[API] This app is not approved to access REST endpoints with protected customer data. See https:\/\/shopify.dev\/apps\/store\/data-protection\/protected-customer-data for more details.”}」エラーを返す場合は、アクセス権限をリクエストする。開発ストアの場合は、カスタマー情報へのアクセスを許可するだけで、アクセスできるようになる。
Lambdaでの実装
環境変数の追加
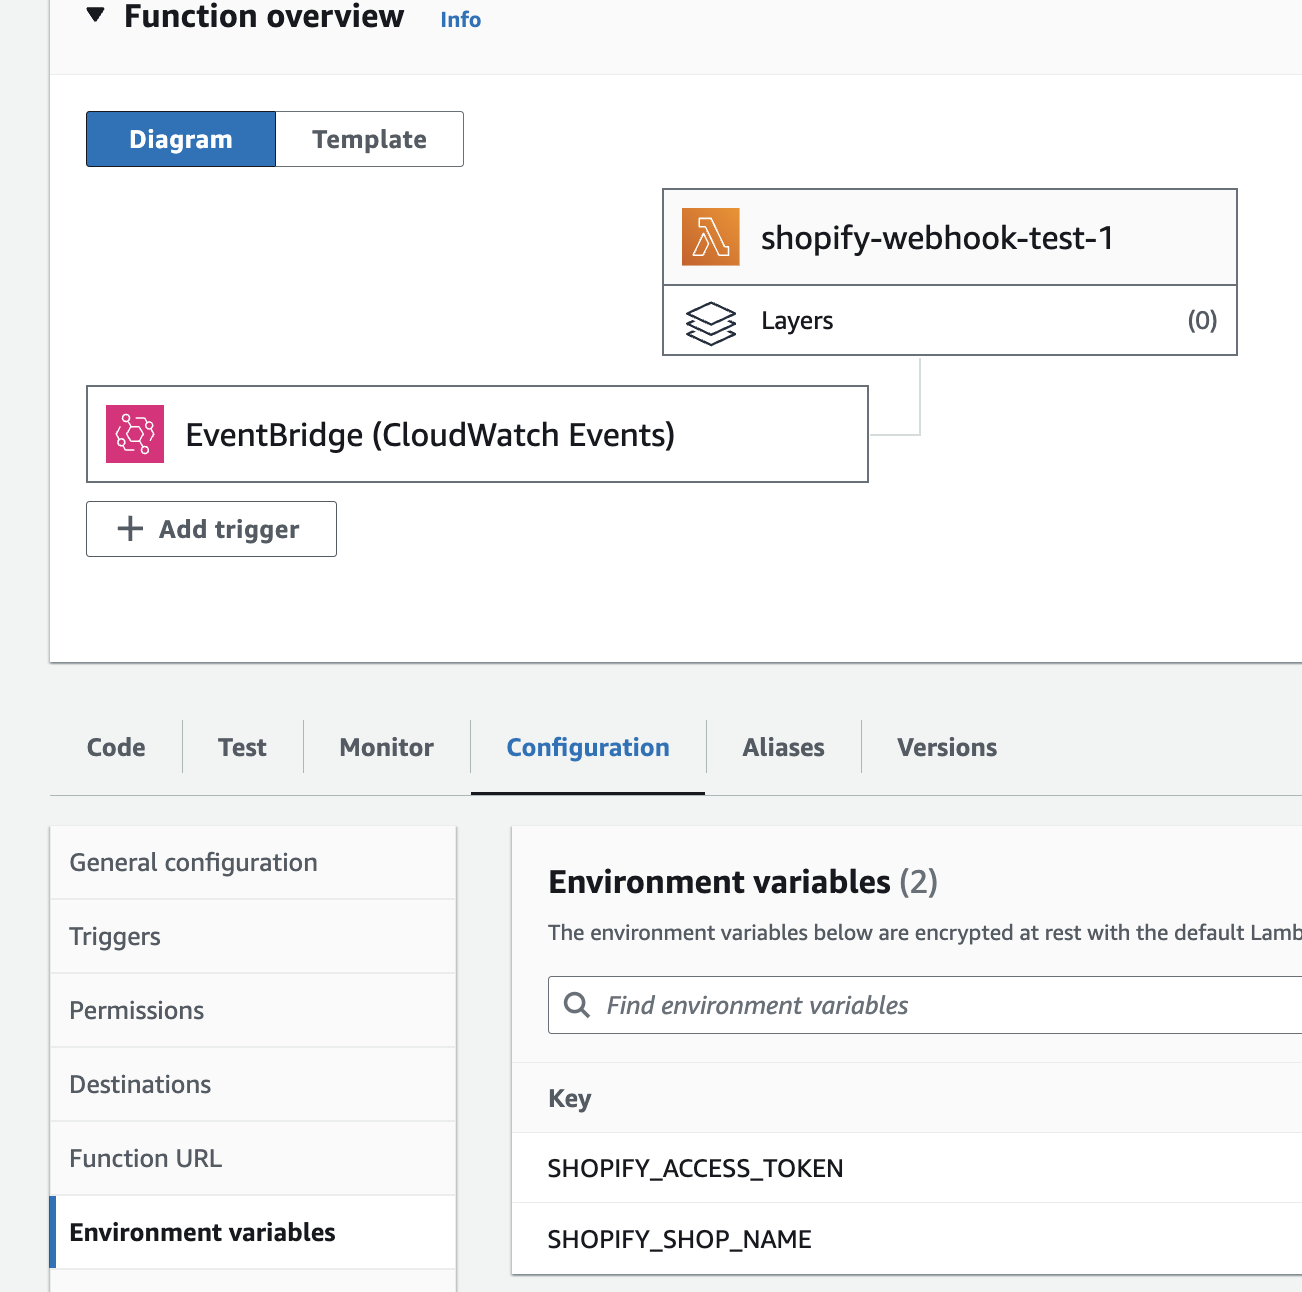
Lambda function > Configuration > Environment variablesから以下を追加する
- SHOPIFY_ACCESS_TOKEN = アクセストークンを設定
- SHOPIFY_SHOP_NAME = ${shop}.myshopify.comの${shop}部分

Code例
import https from "https";

export const handler = async (event) => {
  // console.info("EVENT\n" + JSON.stringify(event, null, 2))

  const options = {
      hostname: `${process.env.SHOPIFY_SHOP_NAME}.myshopify.com`,
      path: '/admin/api/2024-07/orders.json',
      headers: {
        "Content-Type": "application/json",
        "X-Shopify-Access-Token": `${process.env.SHOPIFY_ACCESS_TOKEN}`
      }
  };

  const orderId = event["detail"]["payload"]["id"];

  const getOrders = () => {
    return new Promise((resolve, reject) => {
      https.get(options, (resp) => {
        let data = '';

        resp.on('data', (chunk) => {
            data += chunk;
        });

        resp.on('end', () => {
            resolve(JSON.parse(data));
        });

      }).on("error", (err) => {
        reject(err);
      });
    });
  };

  try {
    const orders = await getOrders();
    console.log(orders);
    return orders;
  } catch (error) {
    console.error("Error: " + error.message);
    return { error: error.message };
  }
};


