はじめに
ビギナー用の学習コースがあり、こちらから始められますが、
あまりに簡単すぎるため、チャプター4:ワークフローのデザインから始めます。
また、このコースをすすめるには、以下を実行する必要があります。
- コース完了時のバッジ取得のためには、n8n forumに参加する
- テストデータのAPIにアクセスするためこちらに登録し、Emailで認証情報(*1)を受け取ります
- Airtableアカウントを生成する
- AirtableのPersonal accecc token でアクセストークン(*2)を作成する
- name:
n8n credential - scope
data.records:readdata.records:writeschema.bases:read
- Access:
- all resource または以下で作成するbaseを指定する
- name:
- Discordアカウントを作成する
- Discodeのn8n serverにアクセスする
- course-level-1チャンネルにアクセスできることを確認する
Workflowのデザイン
- Workflowを作成する
- Workflow name: Nathan’s workflow
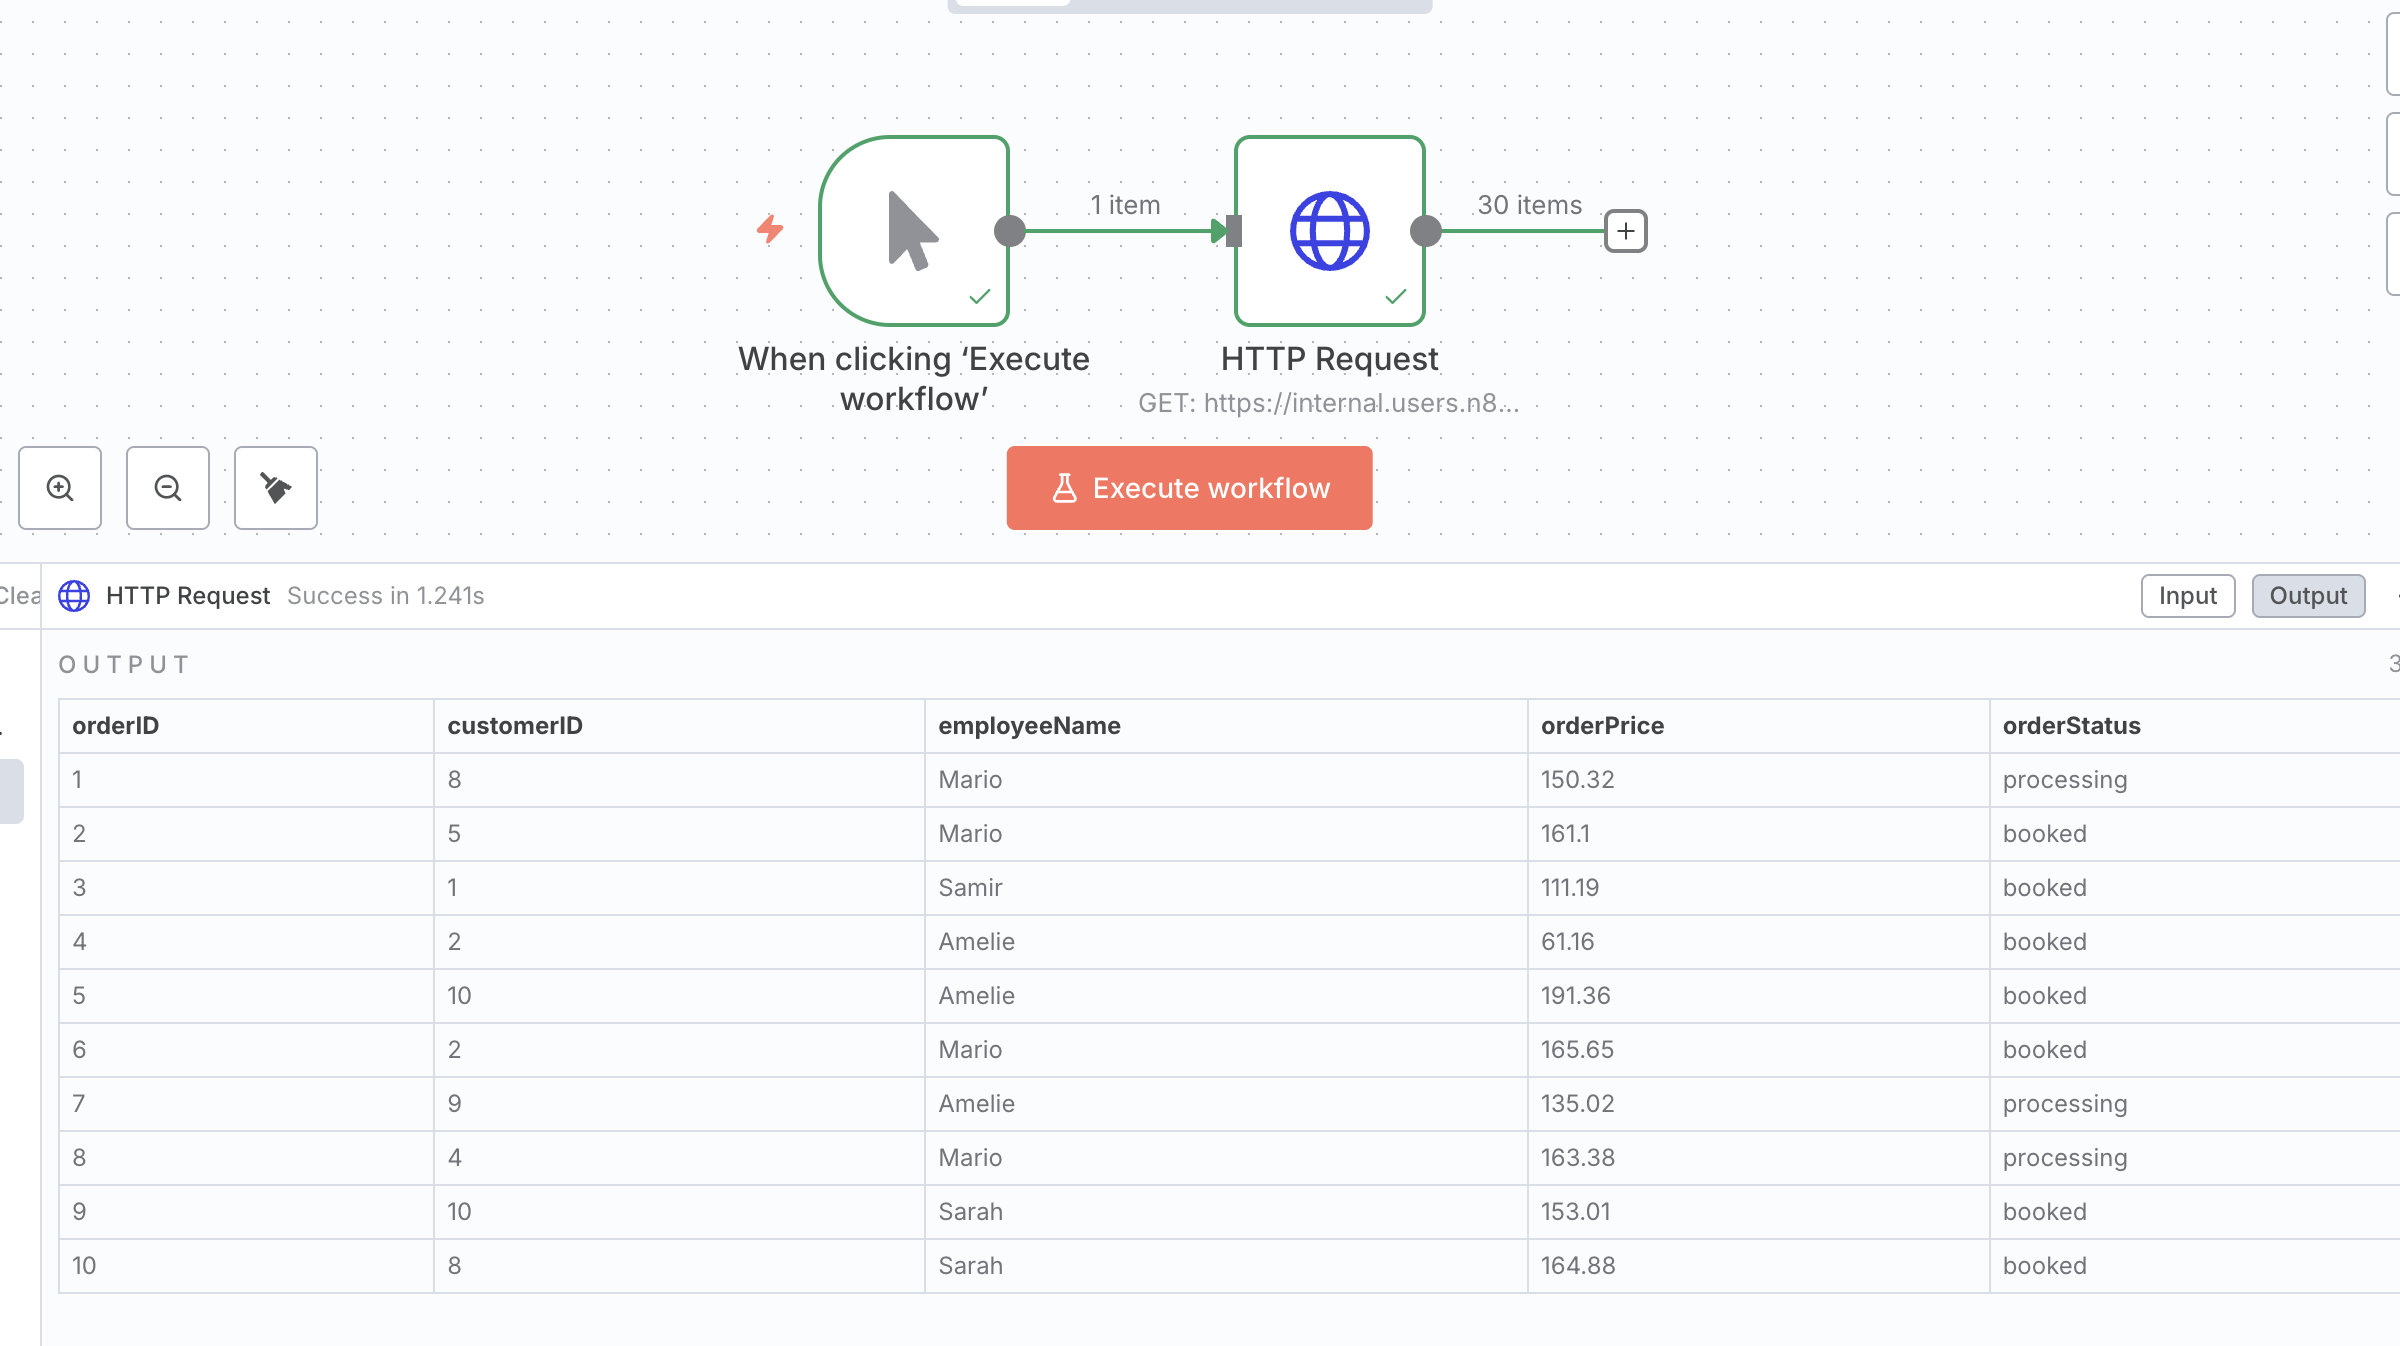
HTTP Requestノードの追加
- HTTP Requestノードを追加する
- Parameterの以下を設定する
- Method: Get
- URL: *1のDataset URL
- Send Headers: true
- Specify Headers: Using Fields Below
- Headers Parameters
- Name:
unique_id - Value: *1のUnique Id
- Name:
- Headers Parameters
- Authentication: Generic Credential Type
- Generic Auth Type: Header Auth
- Header Auth: Create new credential
- Name: *1のHeader Auth name
- Value: *1のHeader Auth value
- Parameterの以下を設定する
実行すると、以下のように注文情報が取得できる
Airtableの準備
- Airtableのワークスペースを開く
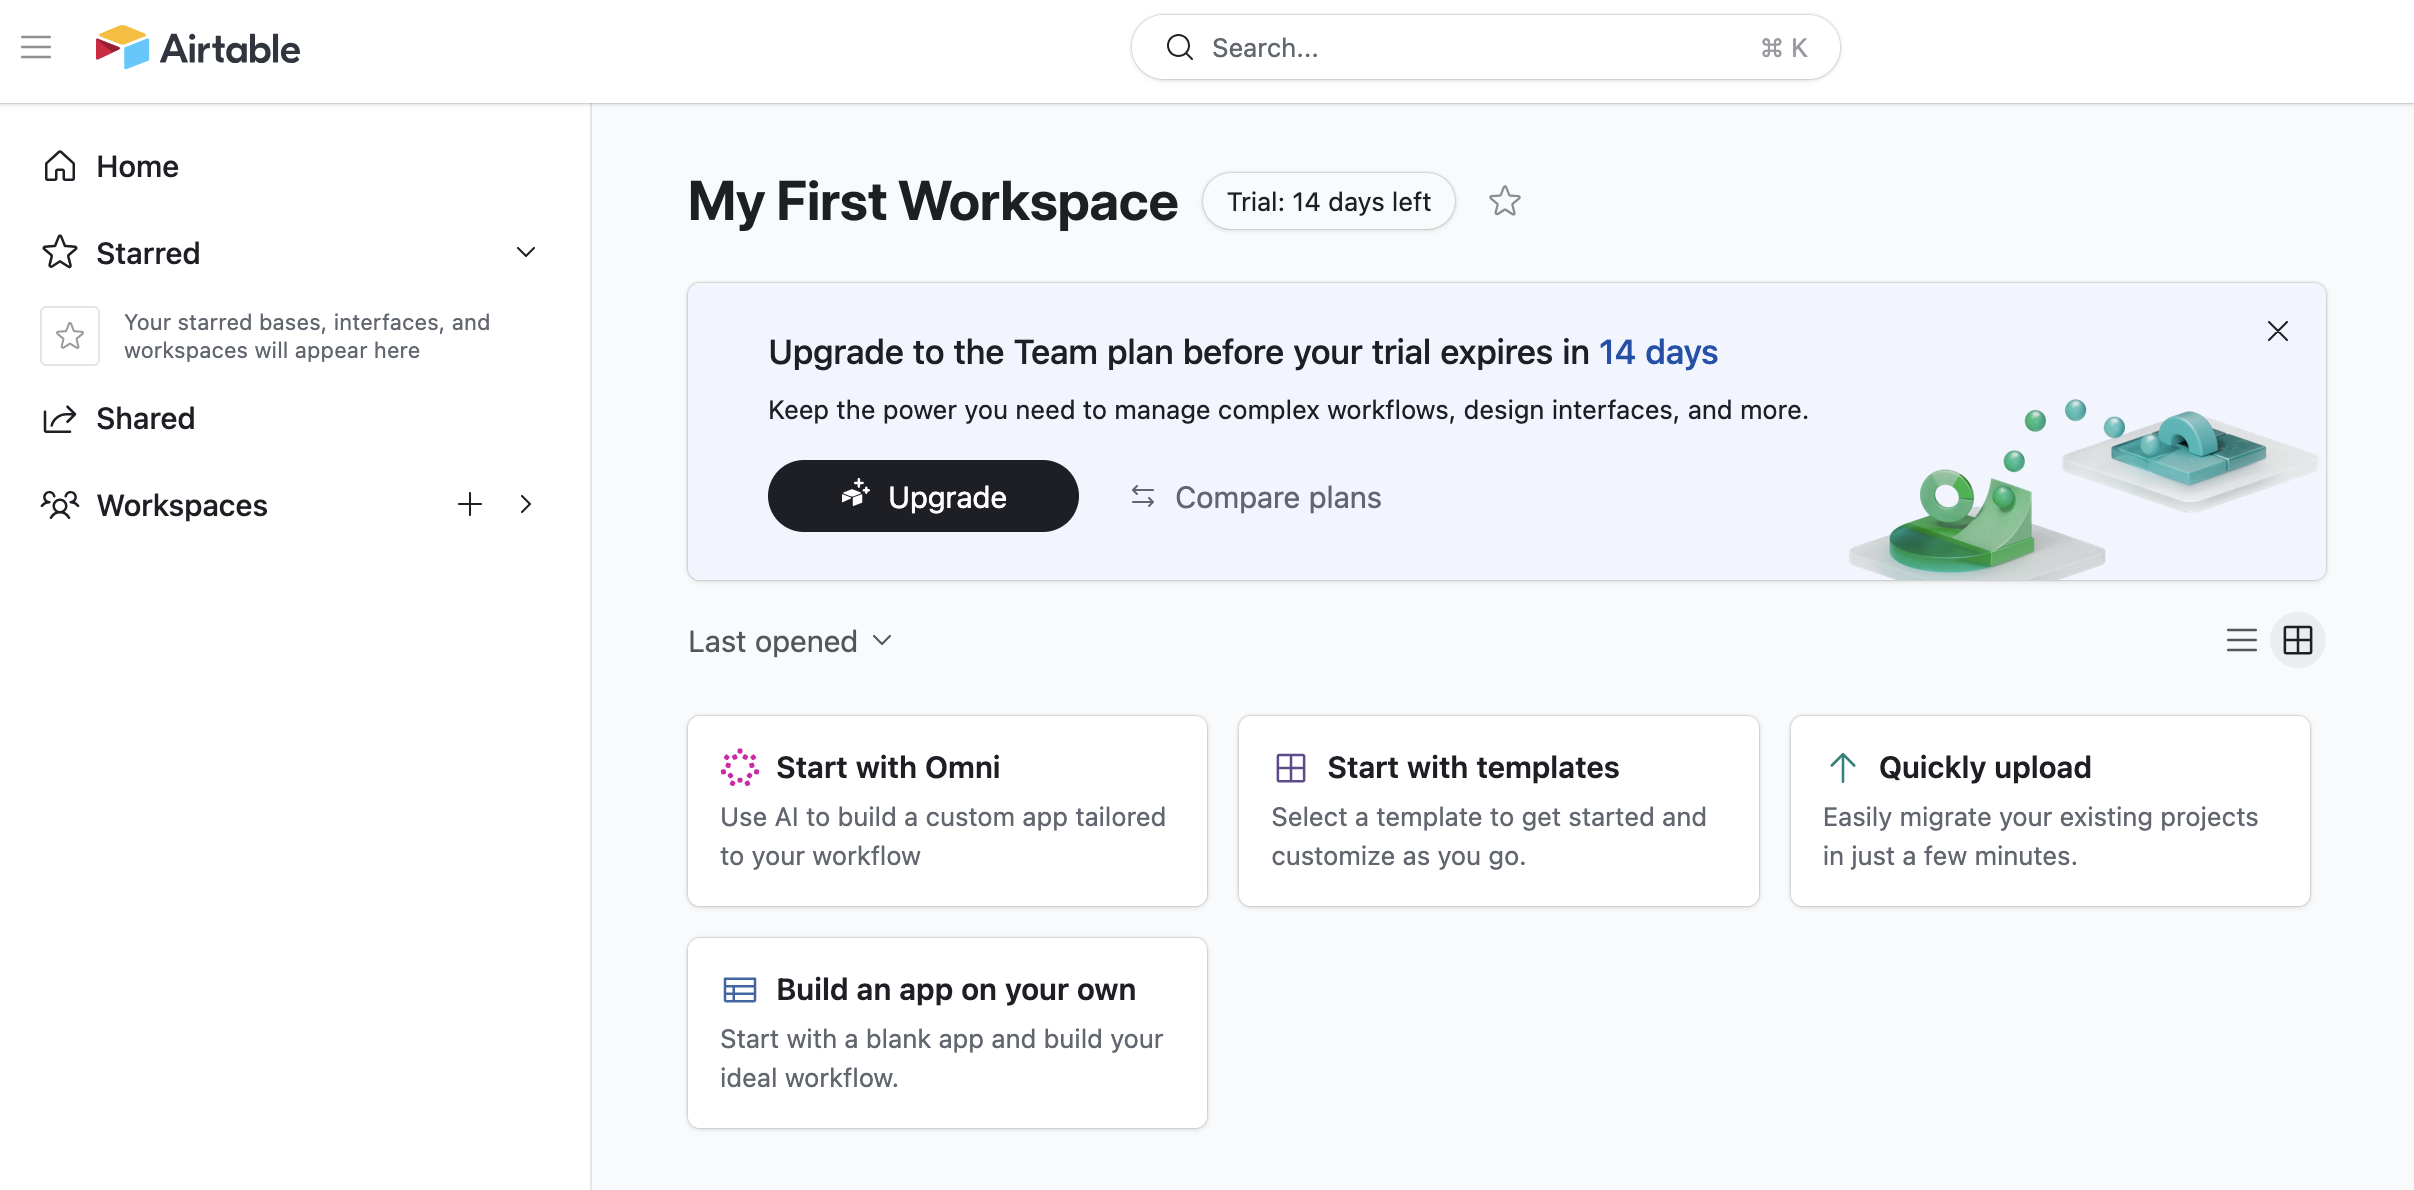
- Build an app on your ownを選択する
- Base nameをUntitled Baseからbeginner courseに変更する
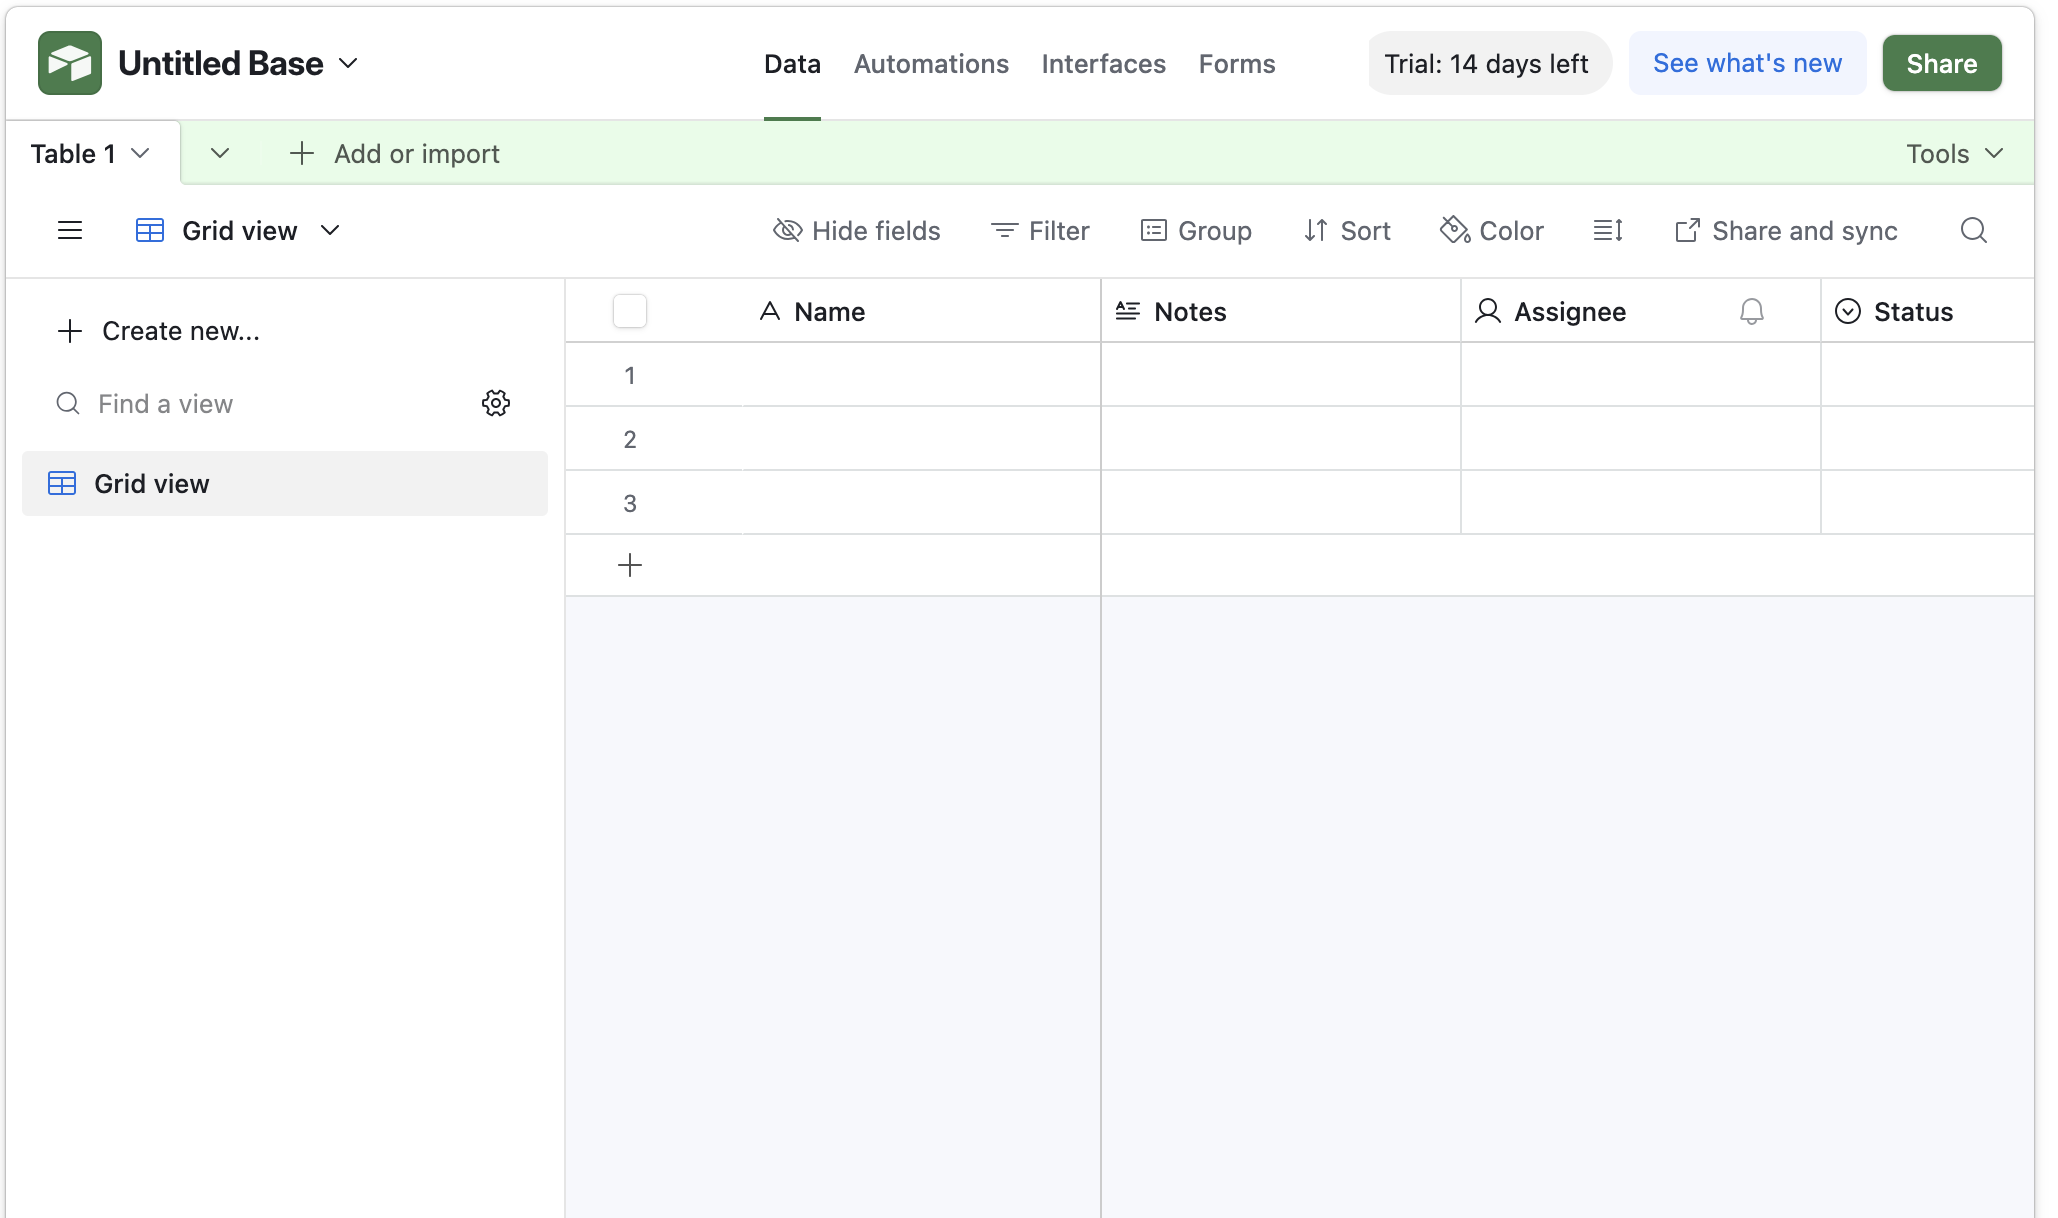
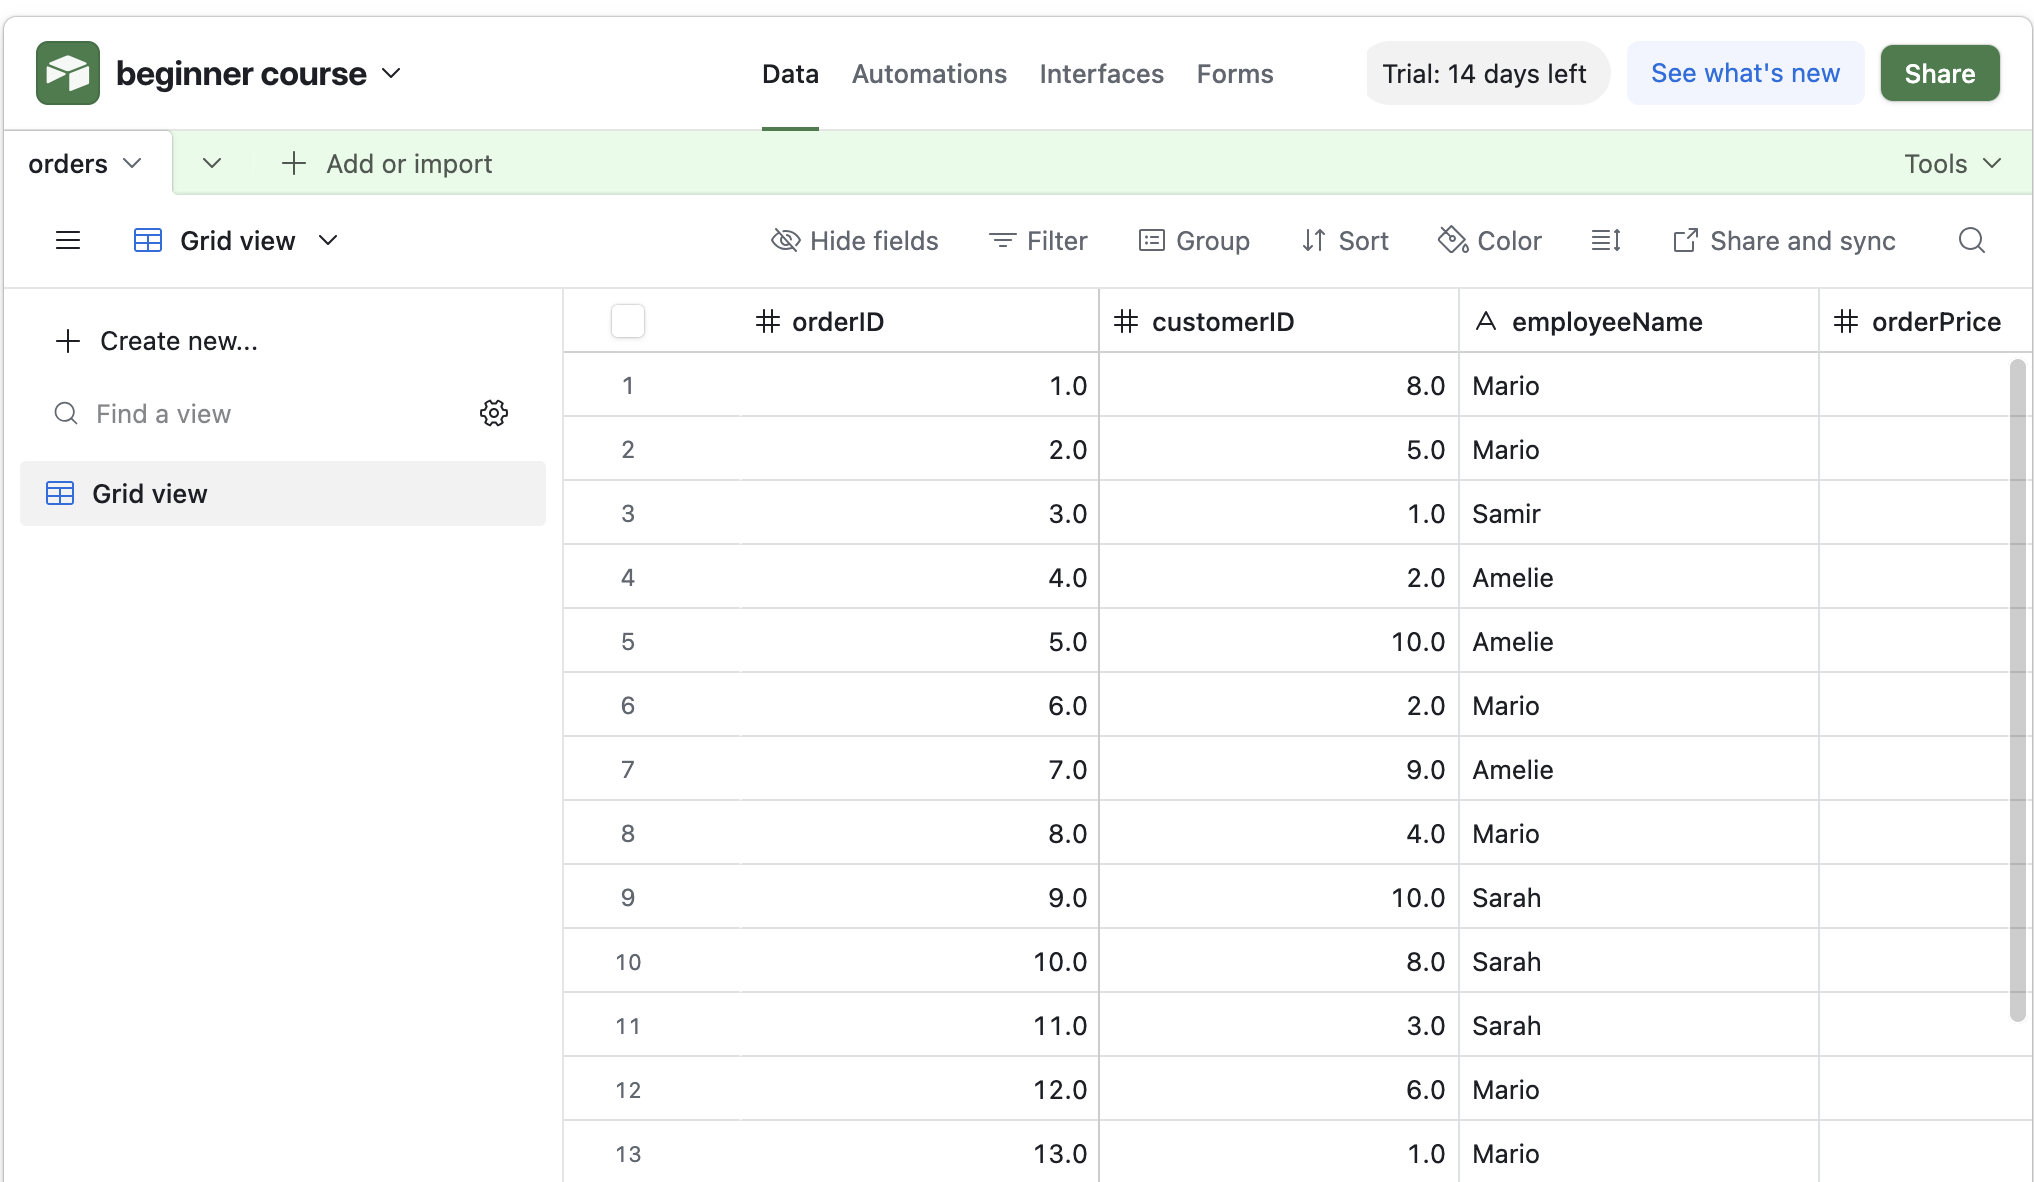
- テーブルを以下のように変更する (*フィールド名はケース・センシティブ)
- テーブル名 Table1 -> orders
- サンプルレコード3件を削除
- フィールド
Notes,Assignee,Statusを削除 - カラム名Name -> orderID, タイプ Single line text -> Number
- カラム追加 customerID as Number
- カラム追加 employeeName as Single line text
- カラム追加 orderPrice as Number
- カラム追加 orderStatus as Single line text
Airtableノードの追加
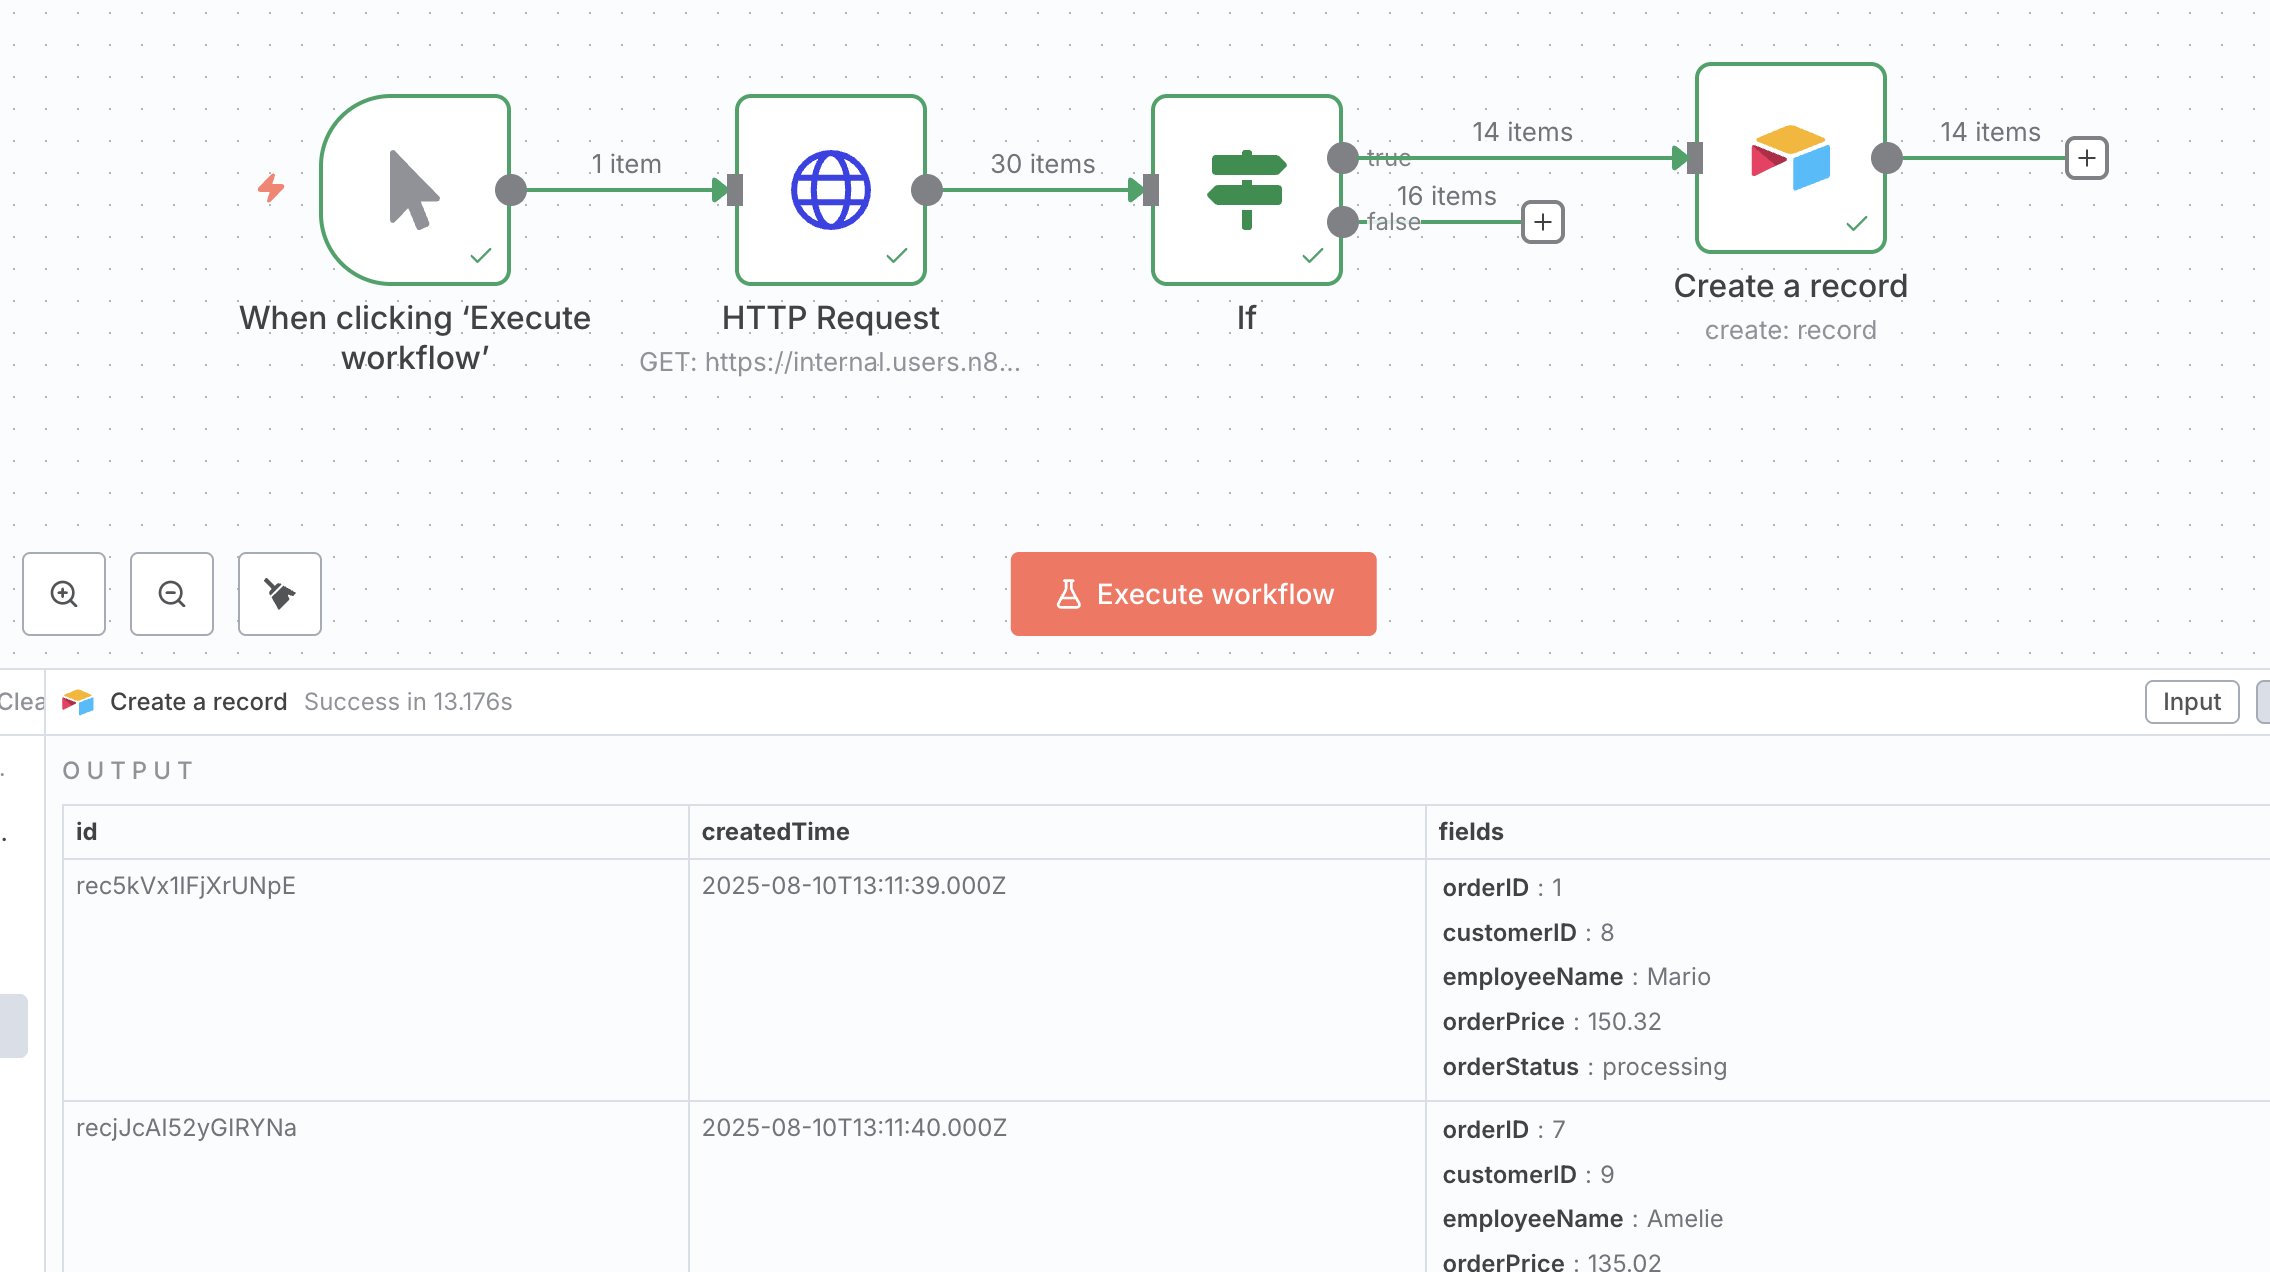
- Airtableノードを追加し、Create a recordを選択する
- Credential to connect with から、Create a credentialを選択する
- Connect Using: Access Token
- Access Token: *2のアクセストークンを貼り付ける
- Resource: Record
- Operation: Create
- Base: beginner course
- Table: orders
- Mapping column mode: Map automatically
- Credential to connect with から、Create a credentialを選択する
- Execute stepを実行する
- OUTPUTにフィールド情報を確認できる
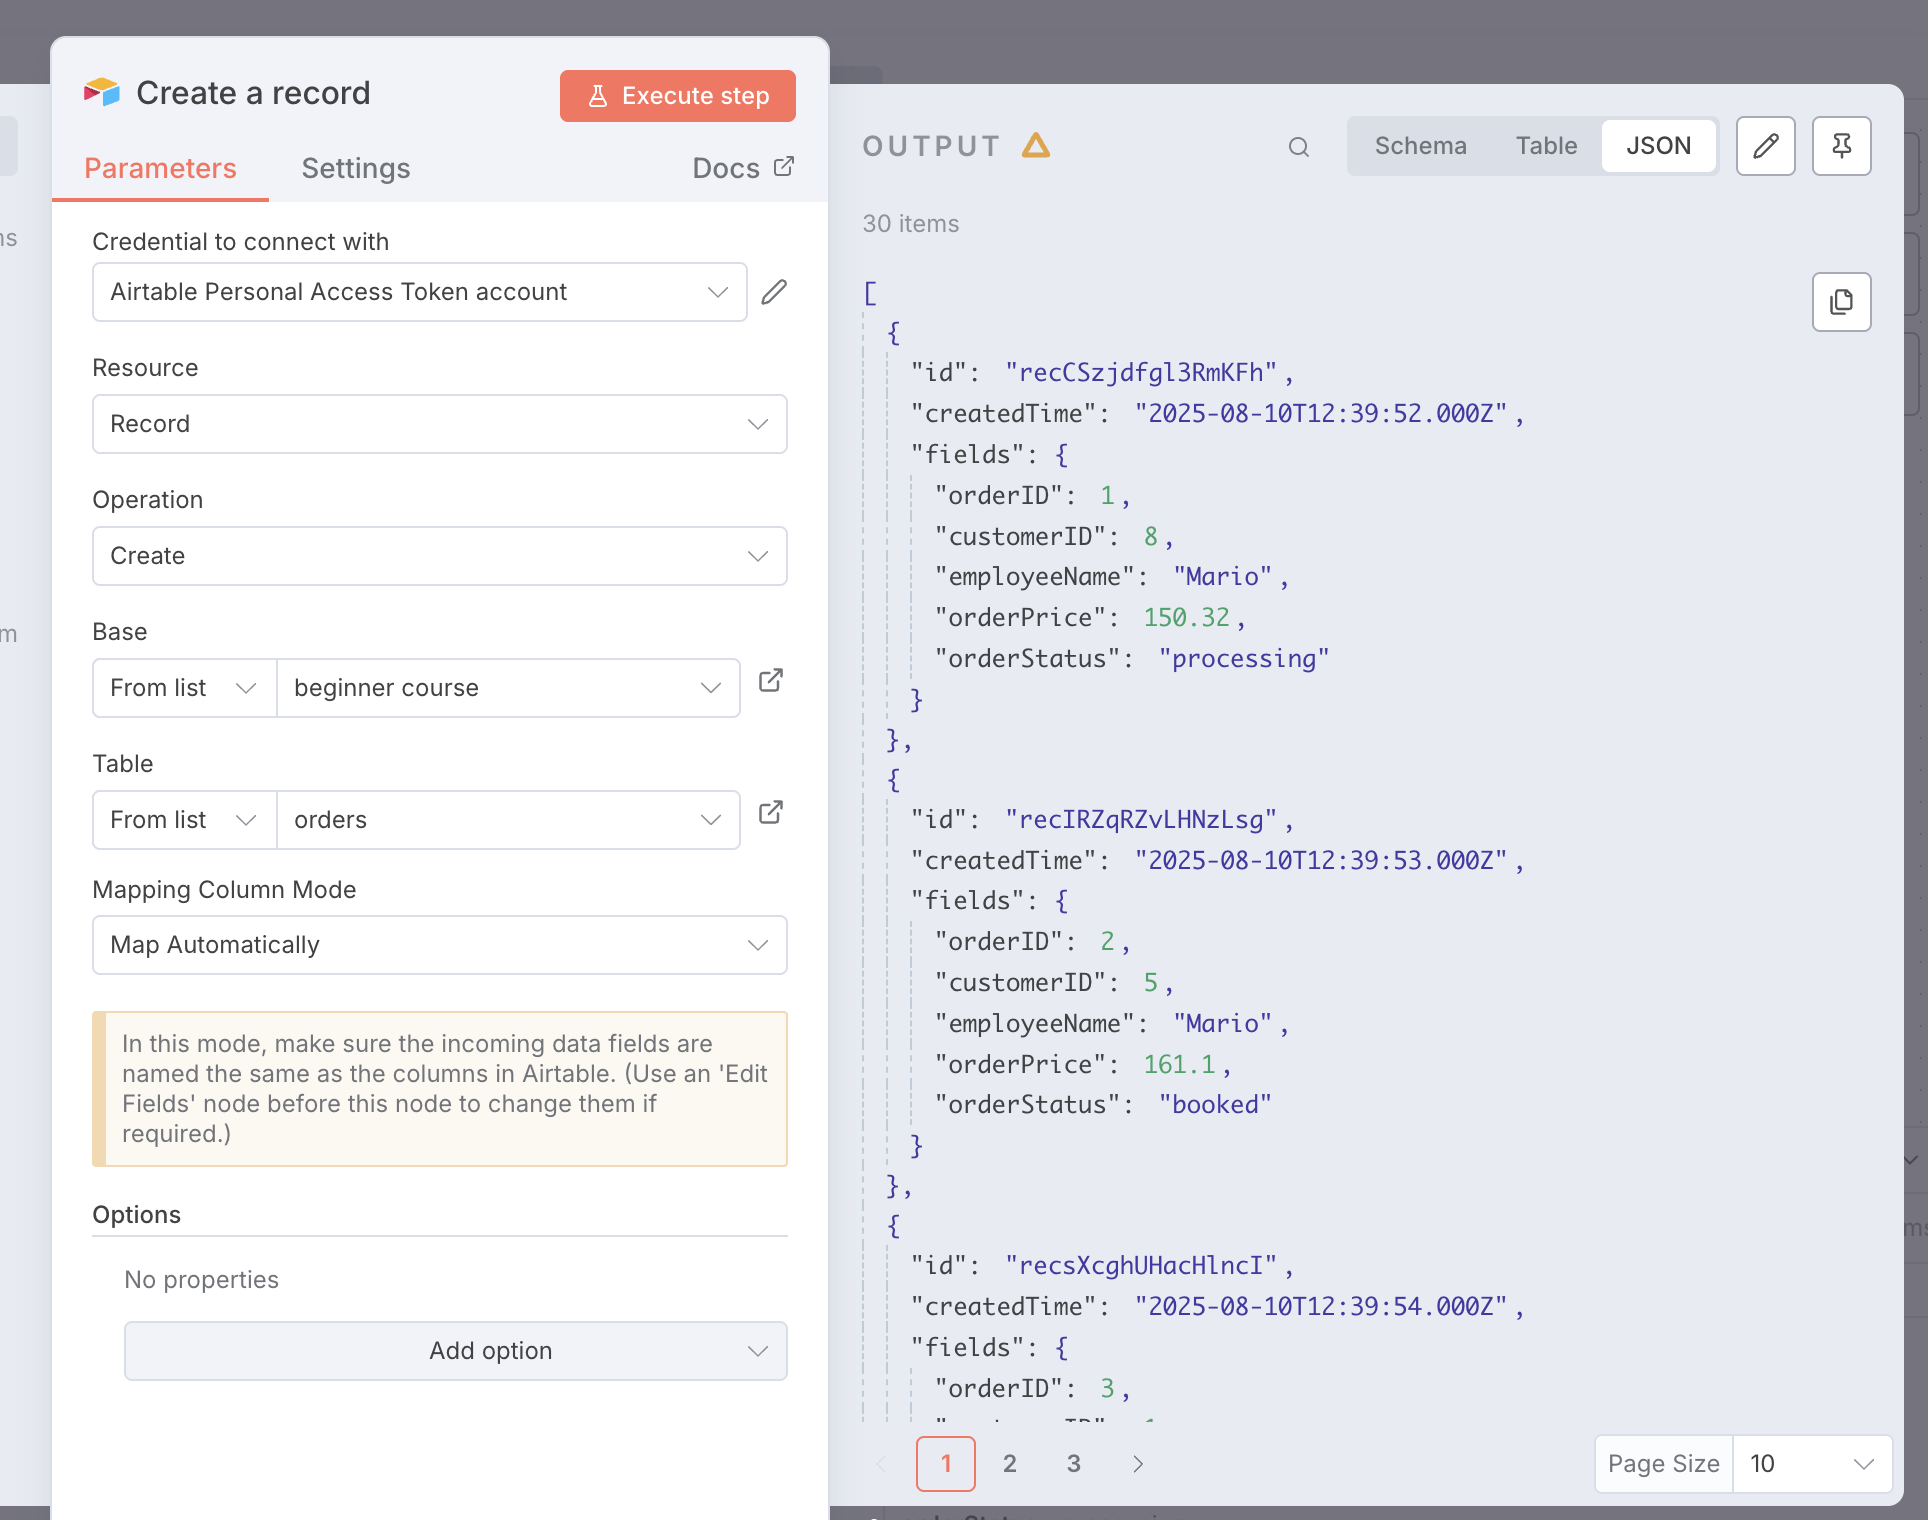
- Airtableのテーブルにデータが格納されていることを確認する
Ifノードの追加
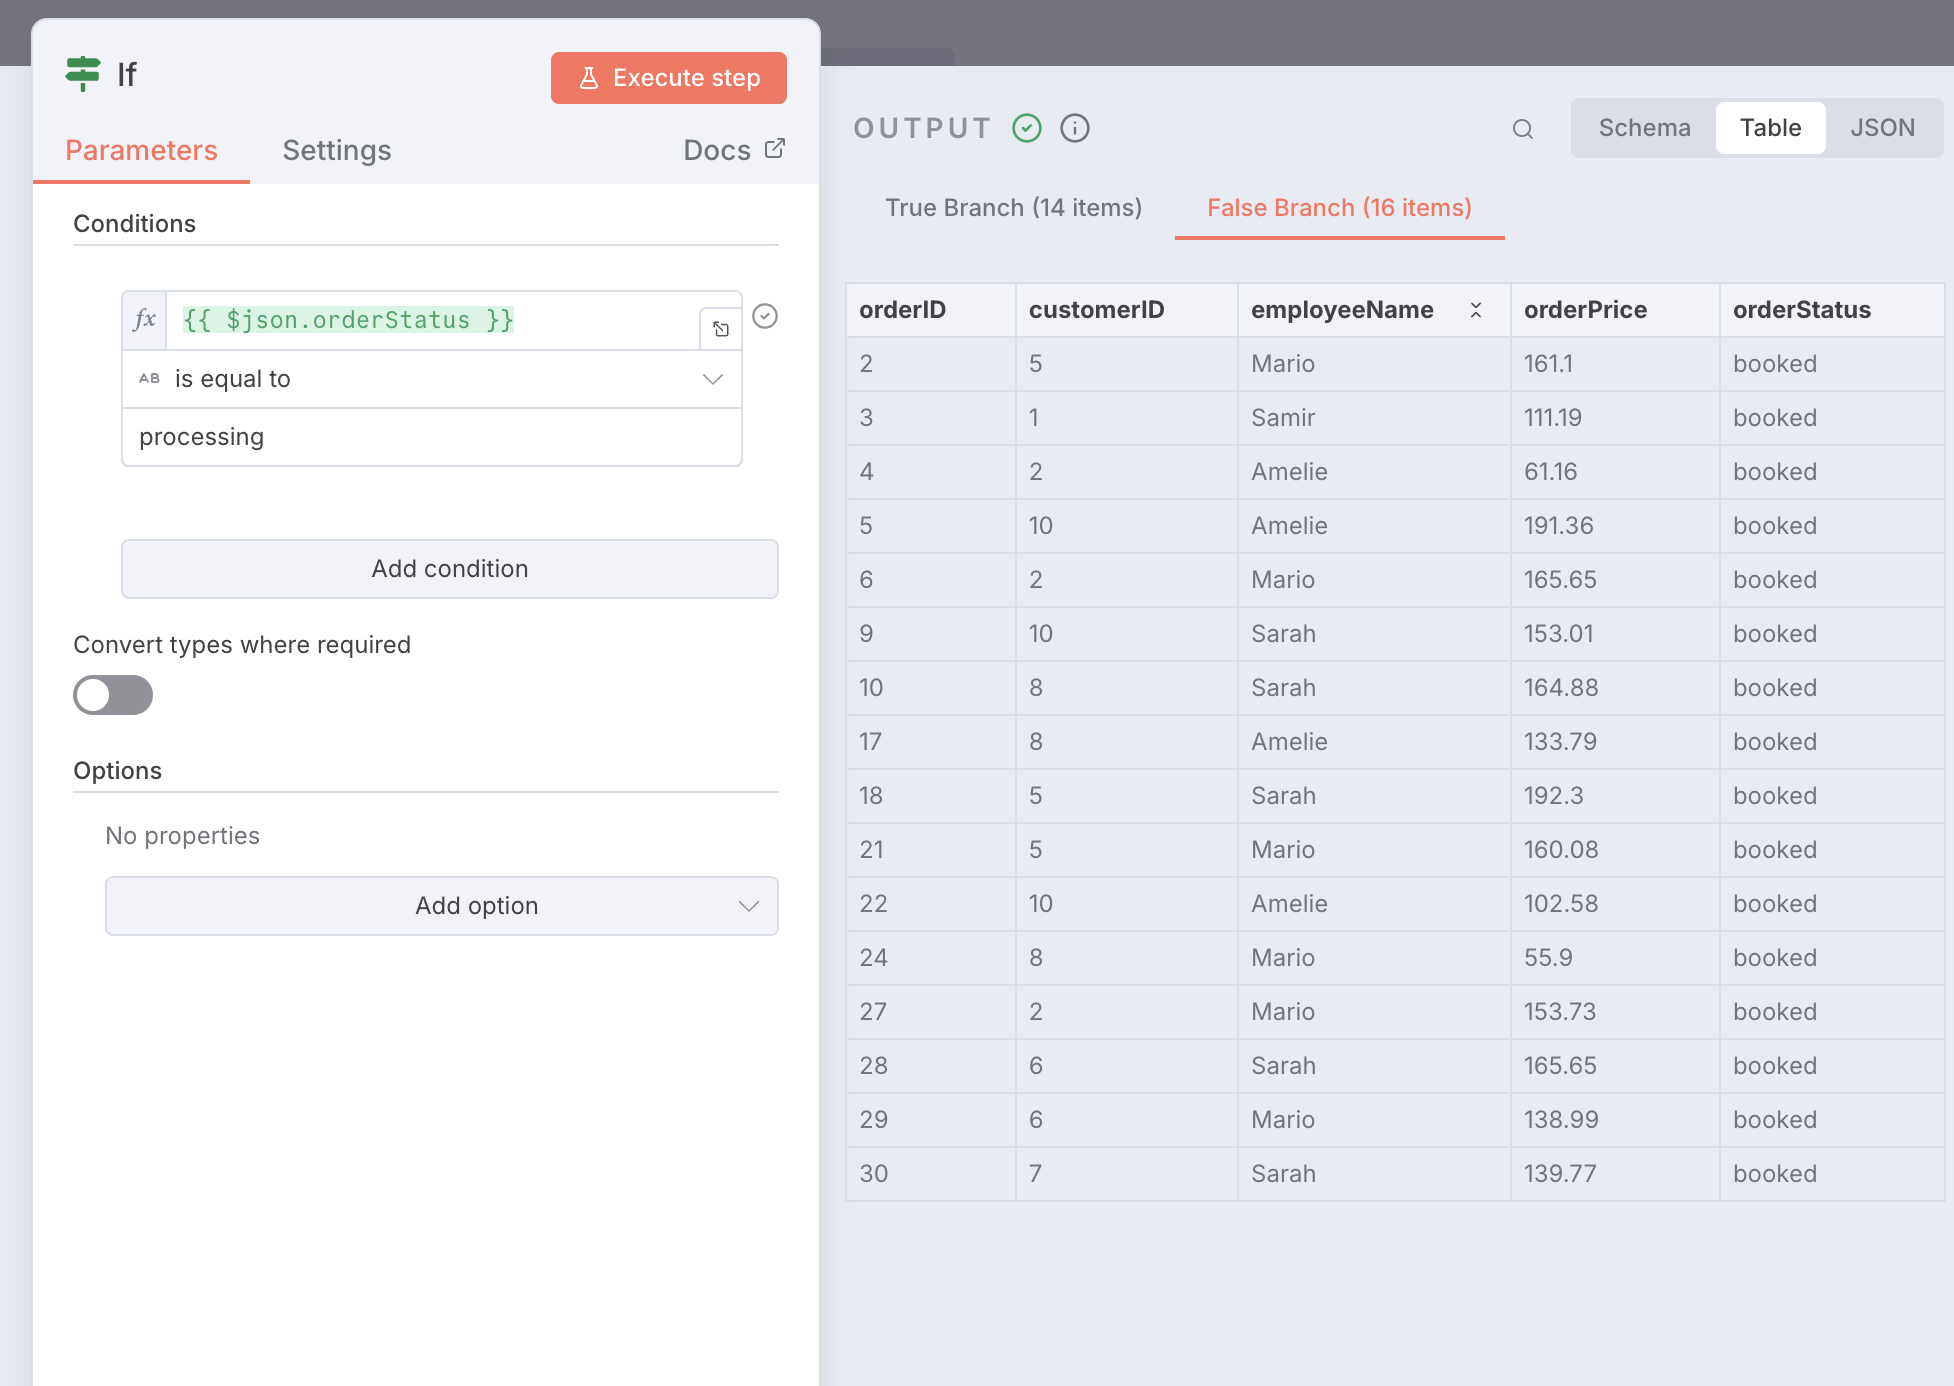
- HTTP RequestノードとAirtableノードの間の+アイコンを選択し、Ifノードを追加する
- Conditions
- value1: Expressionに変更し、「{{ $json.orderStatus }}」を入力する
- operation: is equal to
- value2: processingを入力する
- Conditions
- OUTPUTのTrue branch(if文がTrue)を確認する
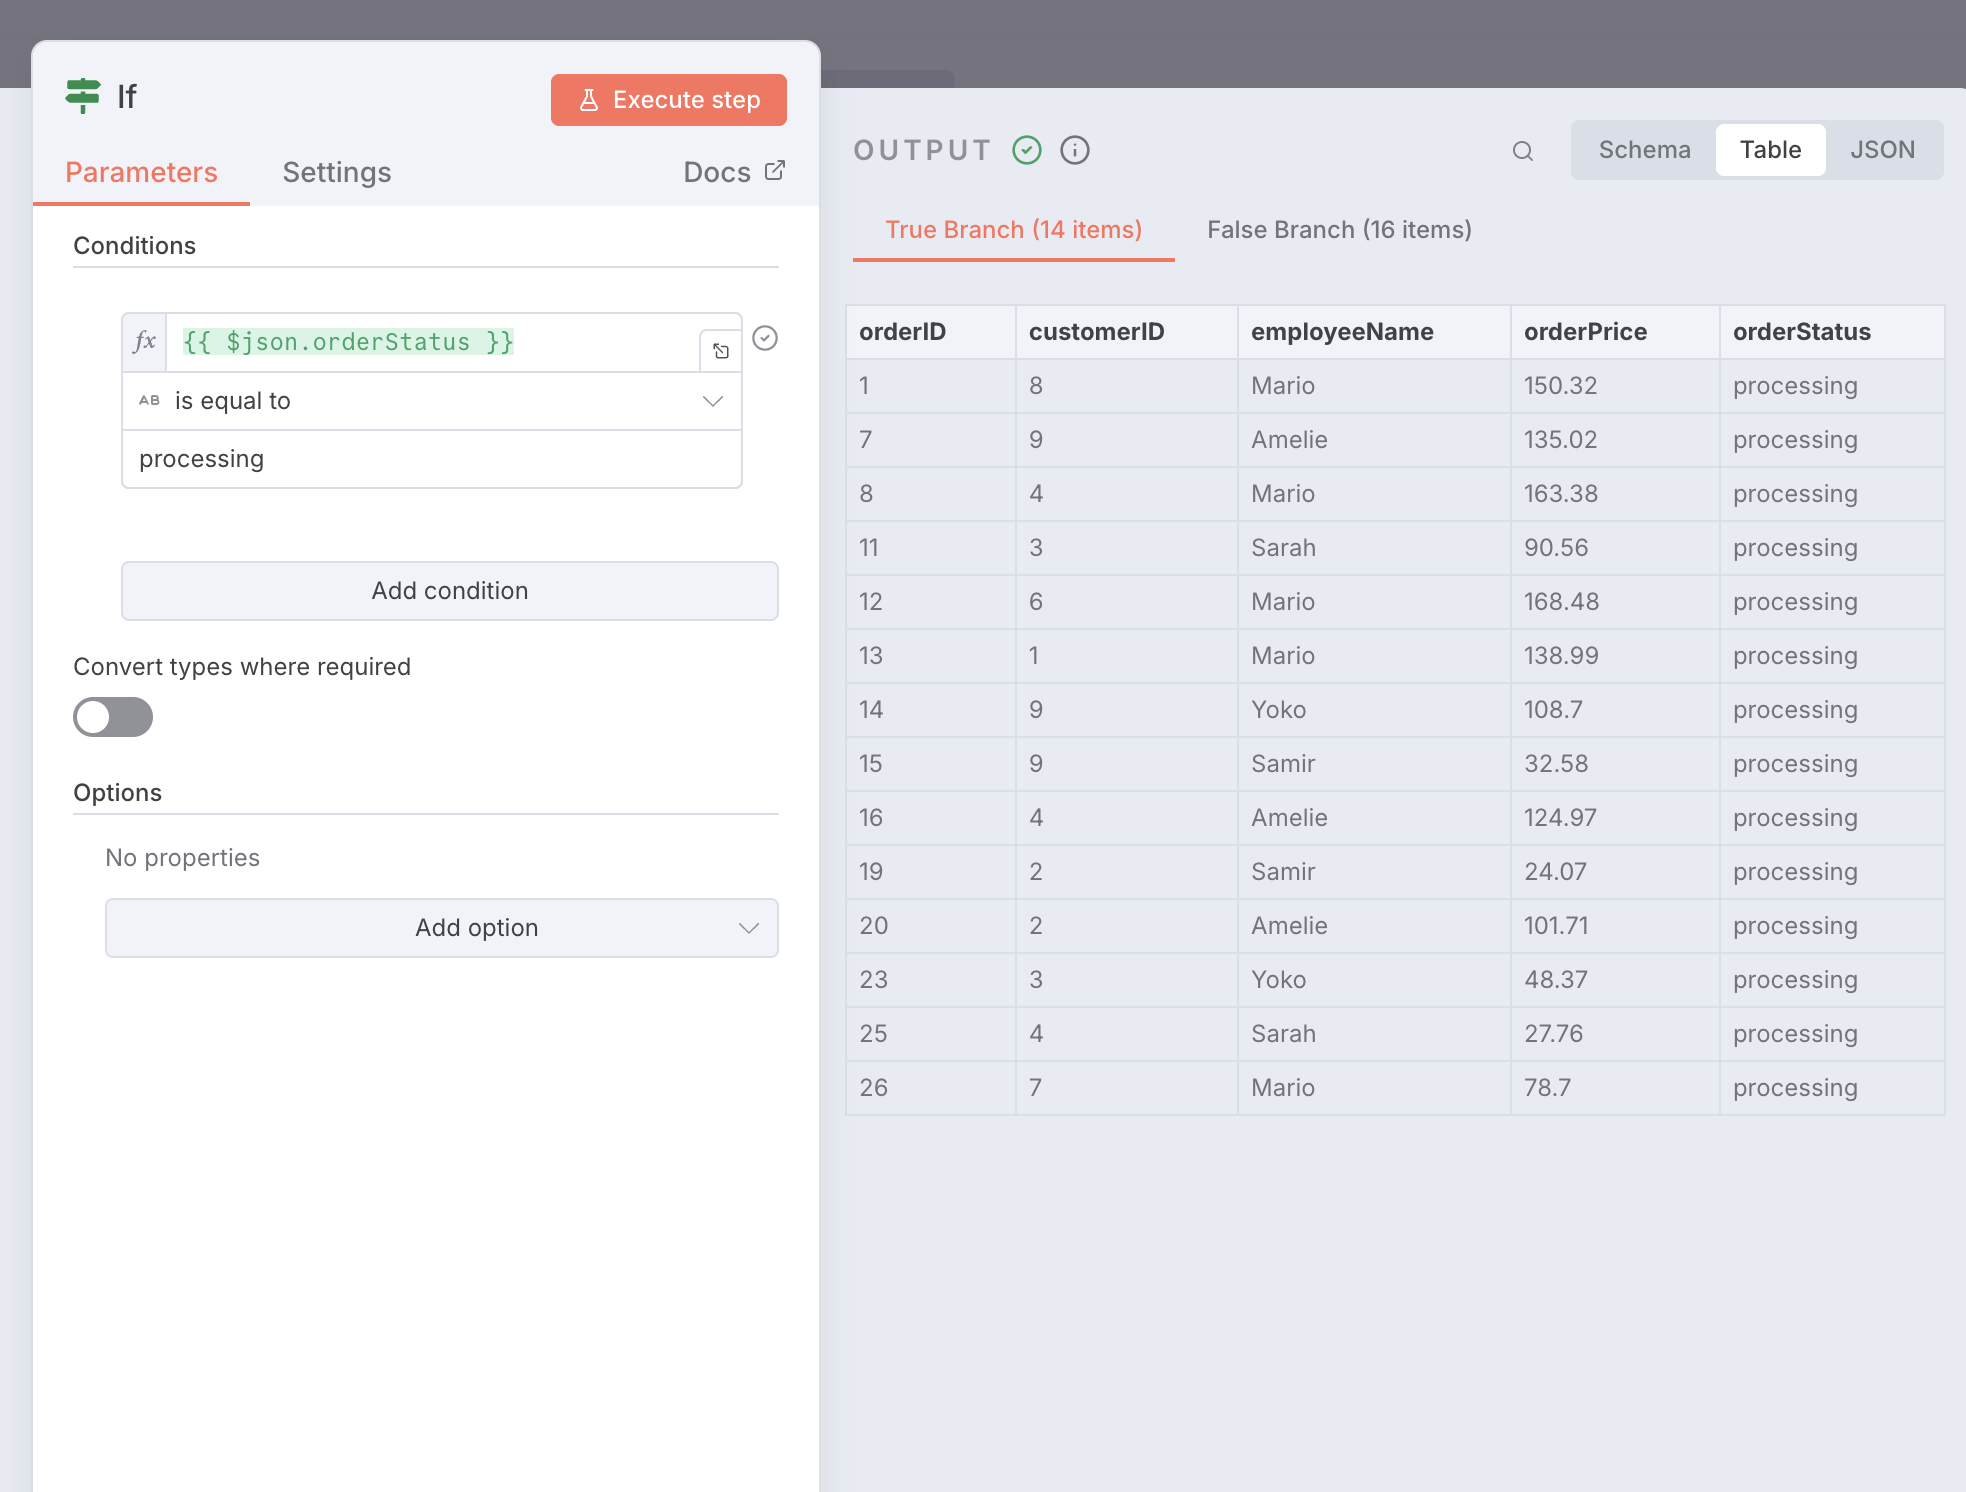
- OUTPUTのFalse branch(If文がFalse)を確認する
- Airtableのレコードを一度すべて削除する
- Canvaに戻り、ワークフローを実行すると、processingのみがAirtableに挿入されることを確認する
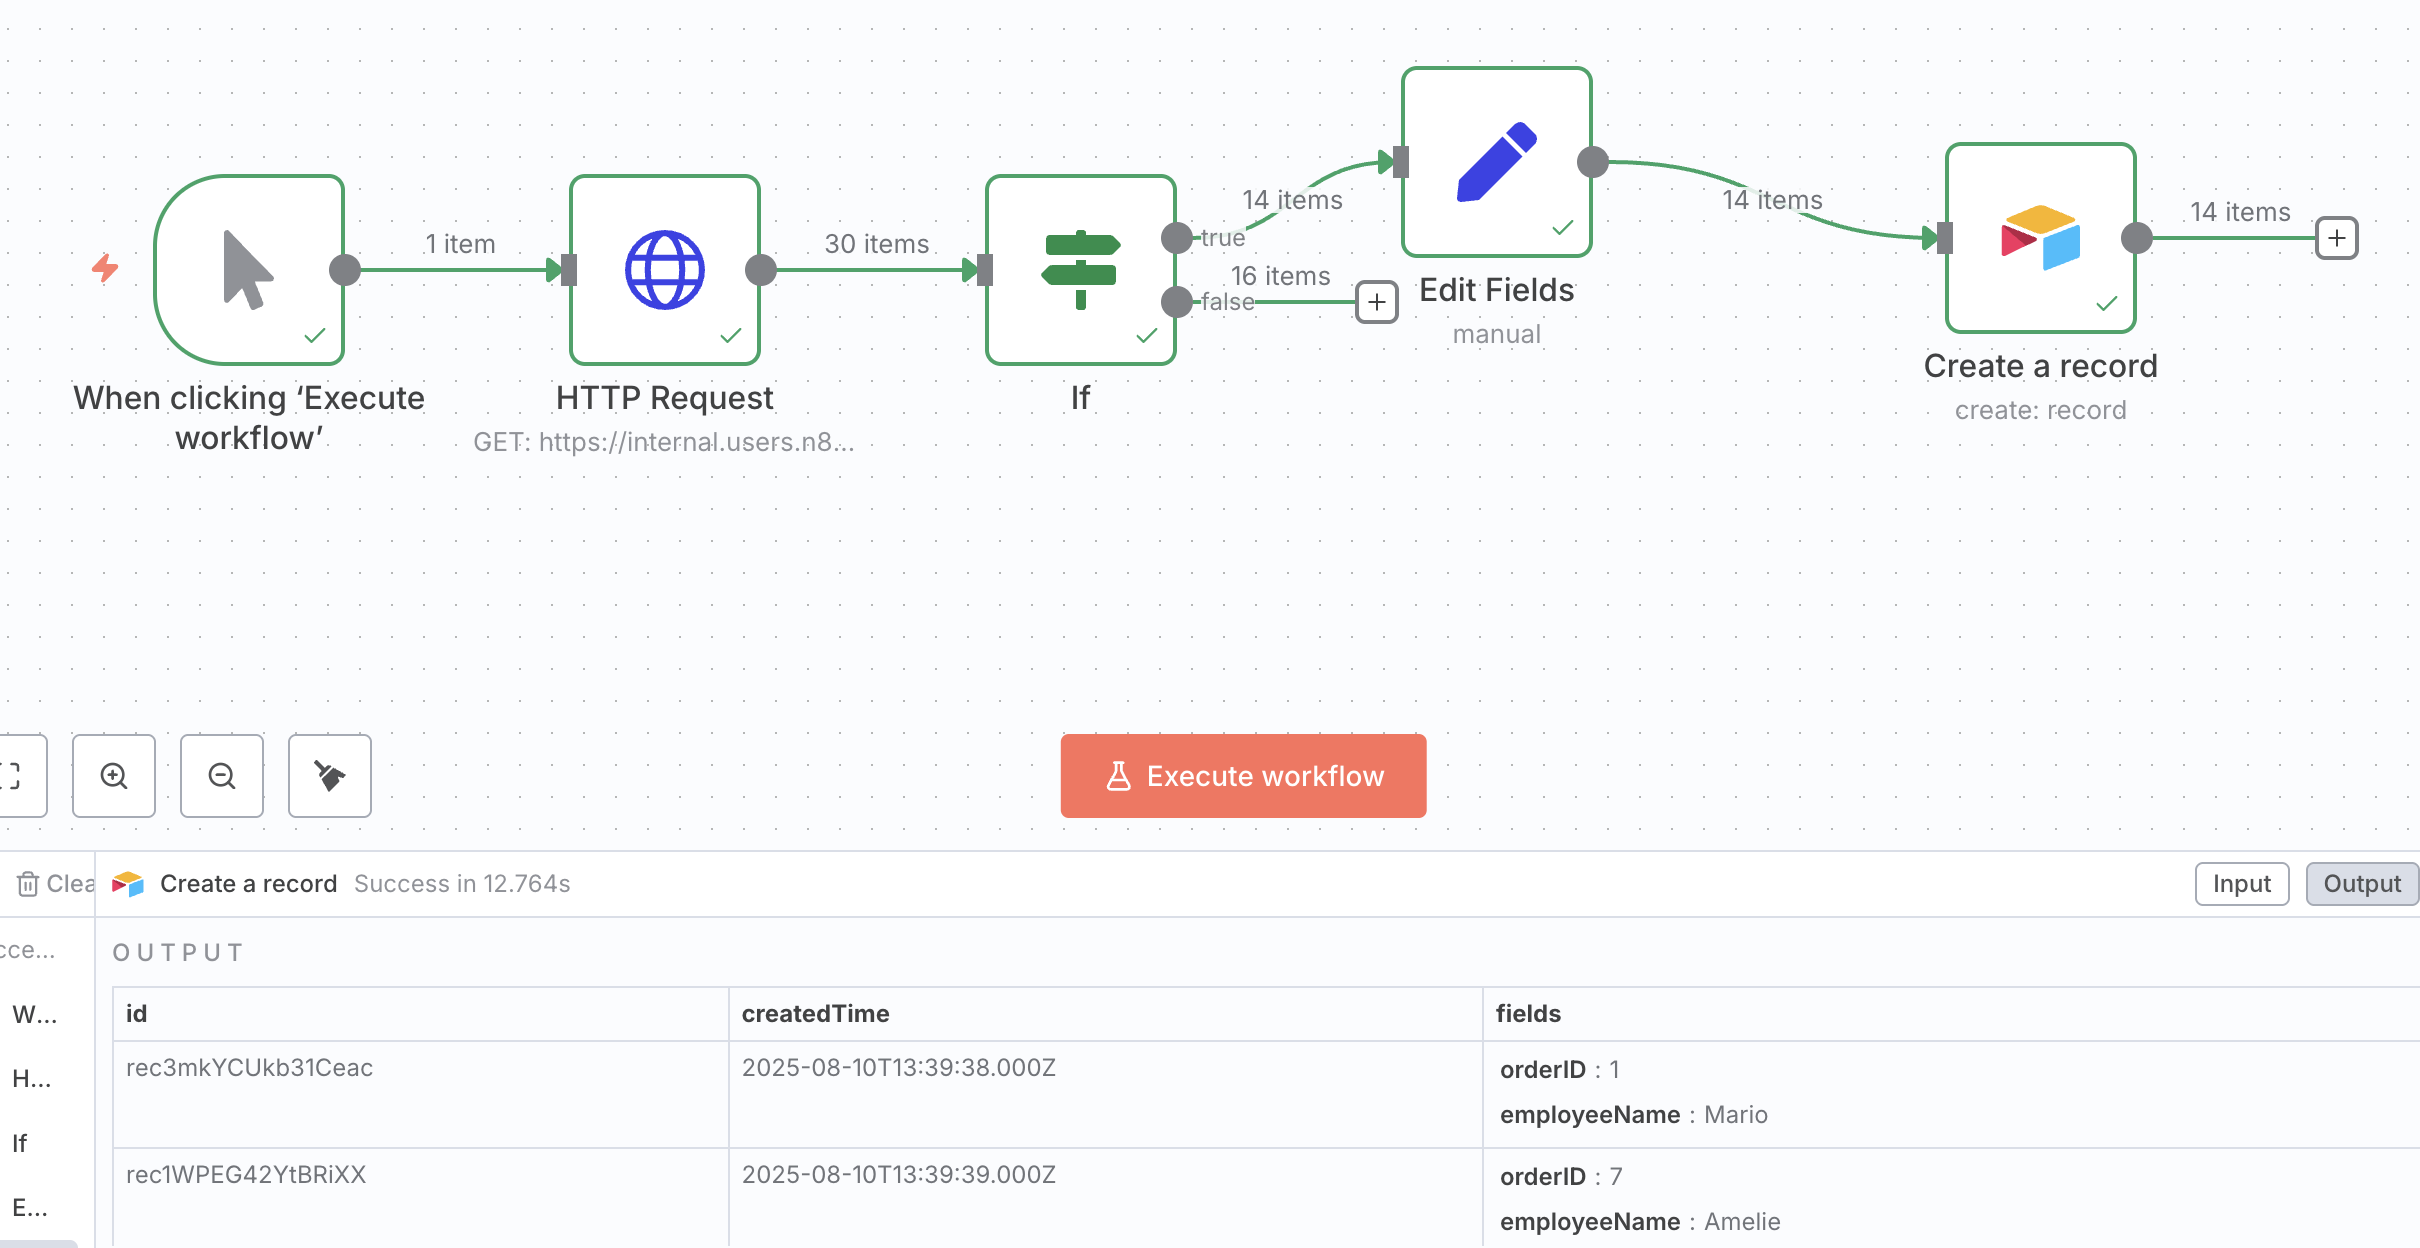
Edit Field (Set)ノードの追加
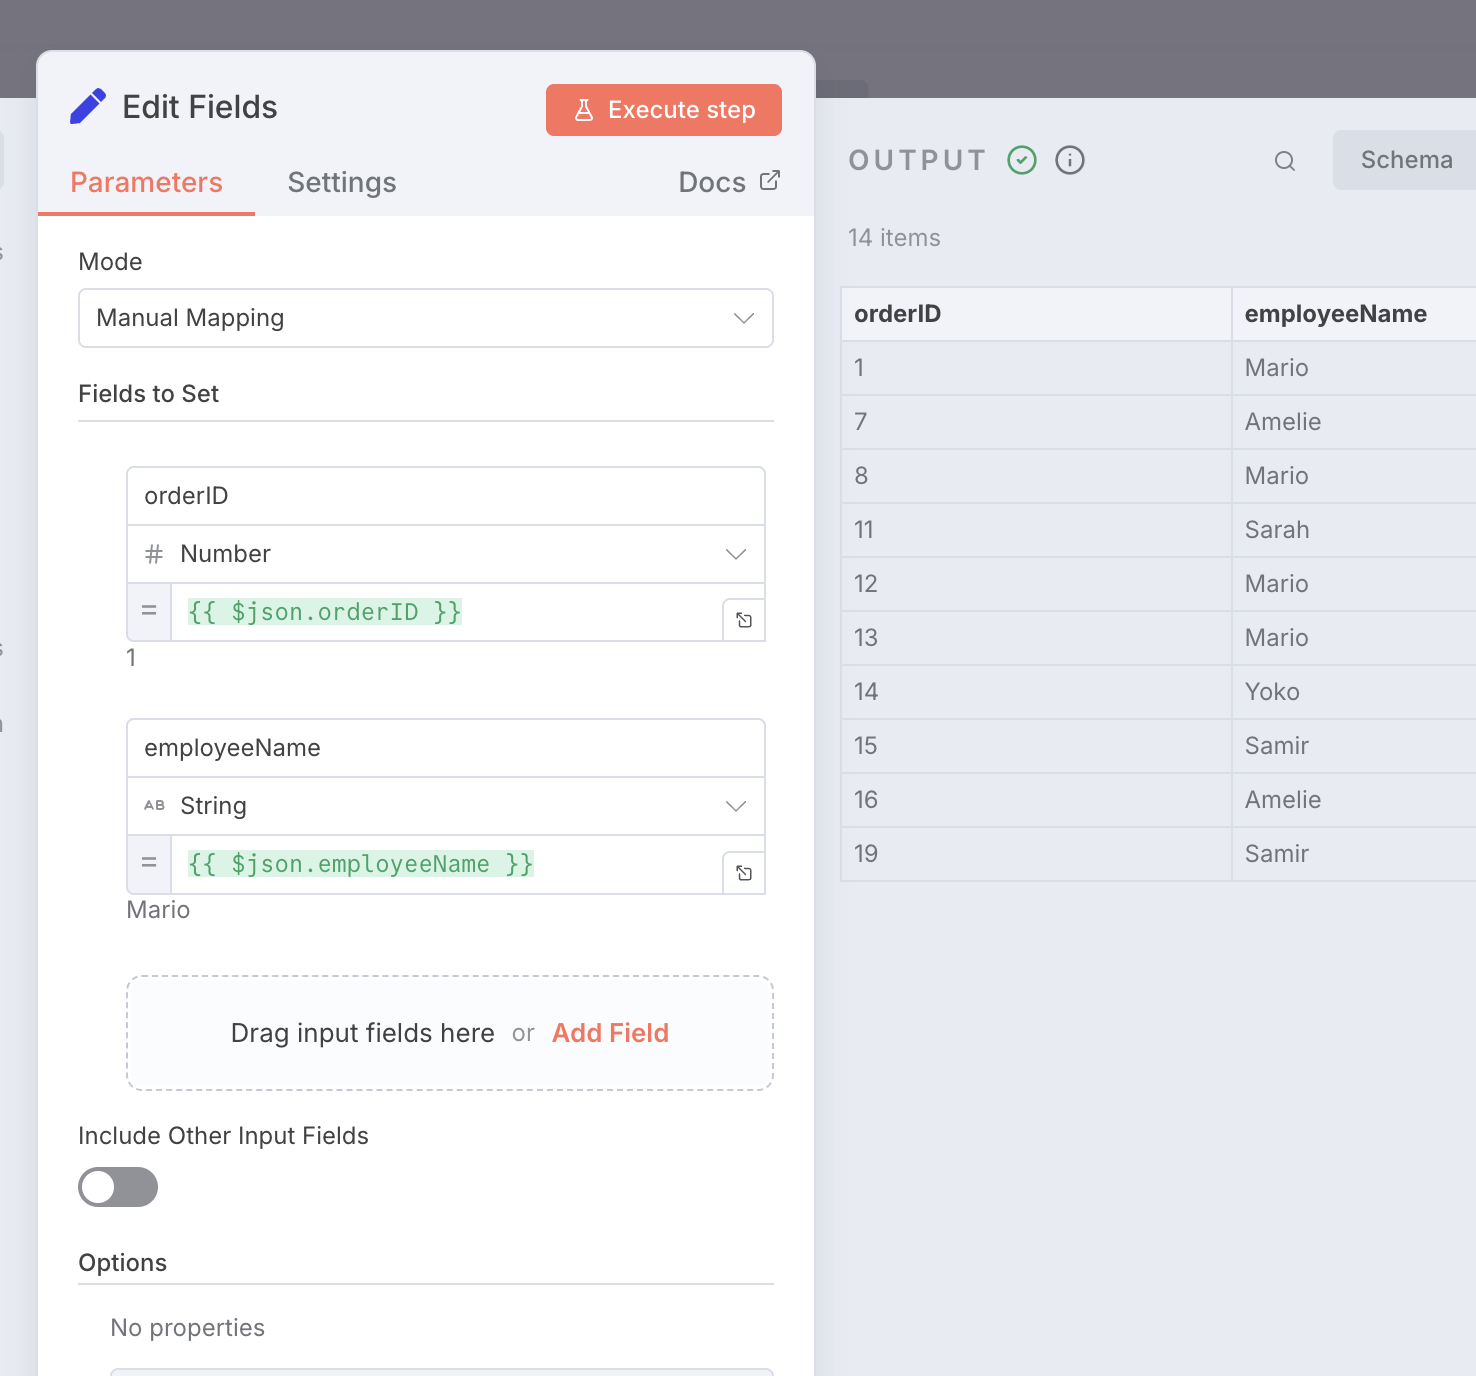
- IfノードとAirtableノードの間に、Edit Field (Set)ノードを追加する
- Parameters
- Mode: Manual Mapping
- Field to Set
- INPUTの”If > Orders”をドラッグ&ドロップする
- INPUTの”If > employeeName”をドラッグ&ドロップする
- Include Other Input Fields: False
- Execute stepを実行する
- Parameters
- Airtableのbeginner courseベースに
processingOrdersテーブルを追加する- フィールドを以下にする
orderID(primary field): NumberemployeeName: Single line text
- フィールドを以下にする
- Airtableノードを開き、Tableを
processingOrdersに変更する
Codeノードの追加
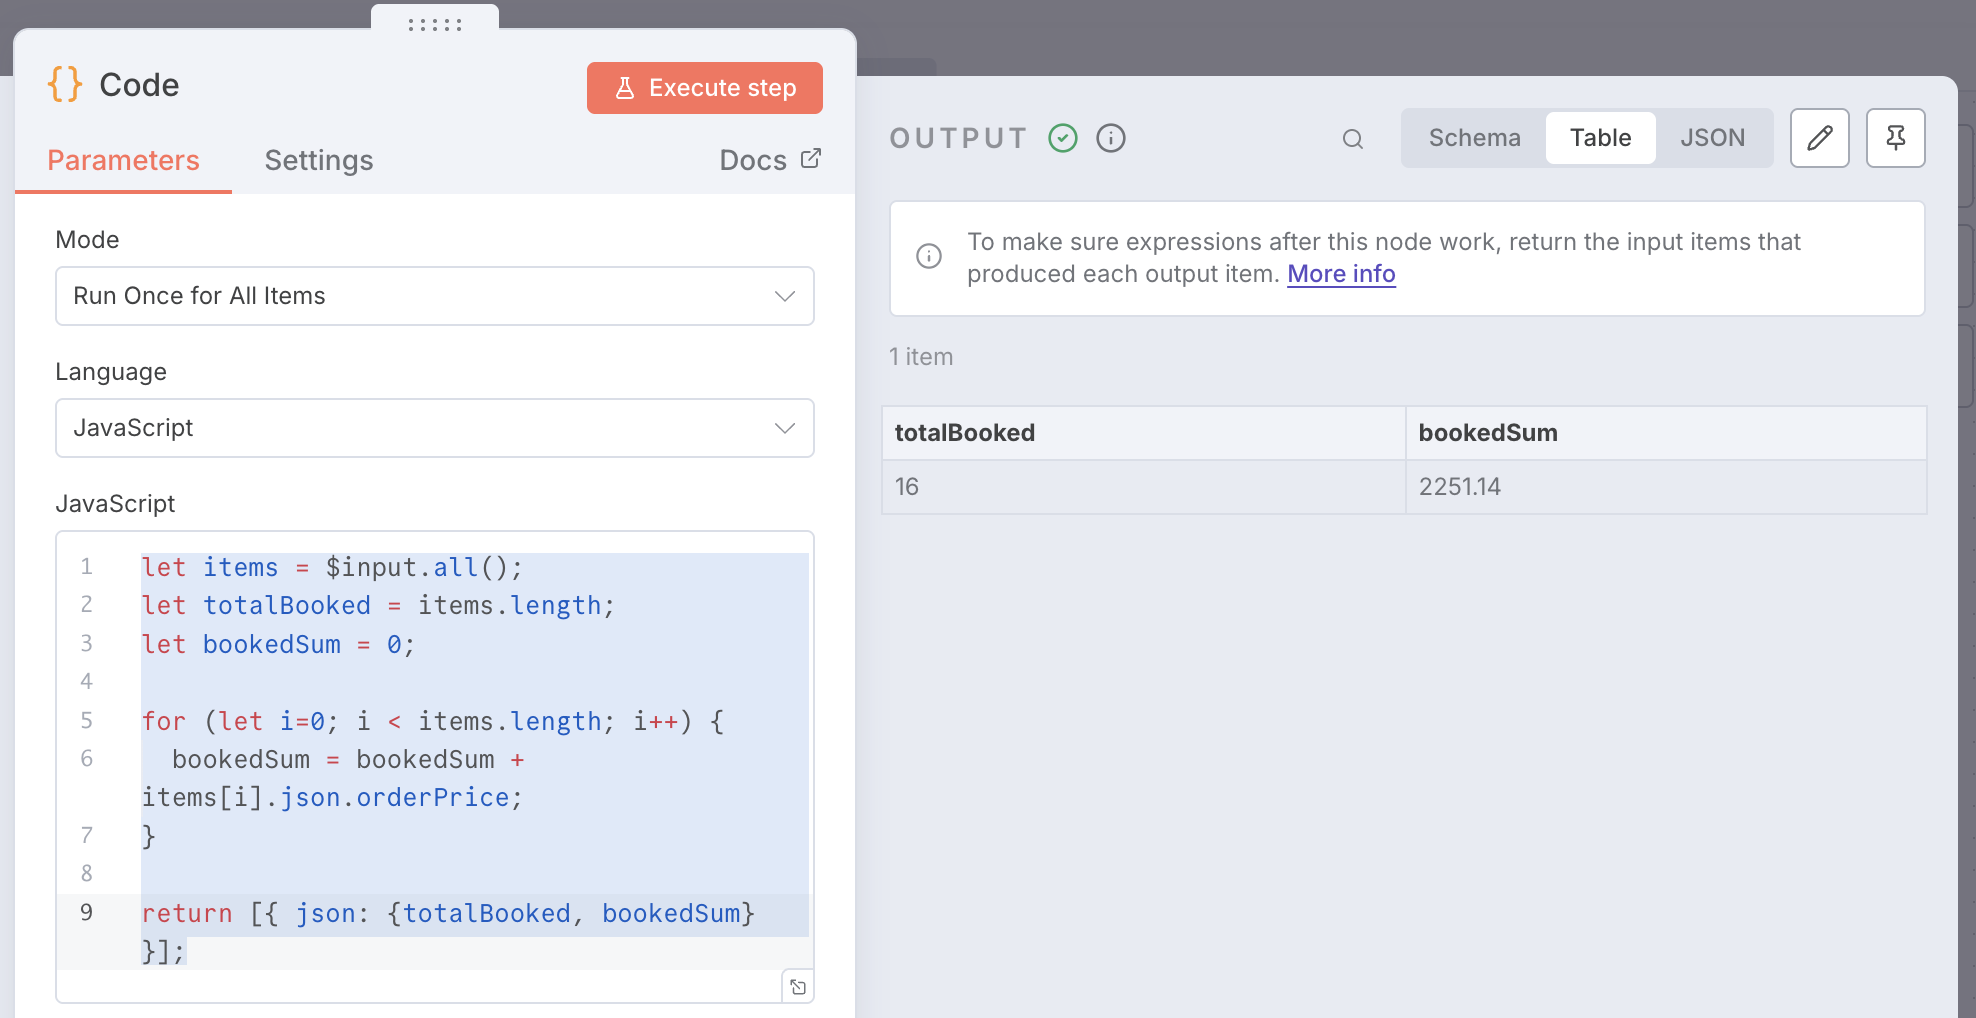
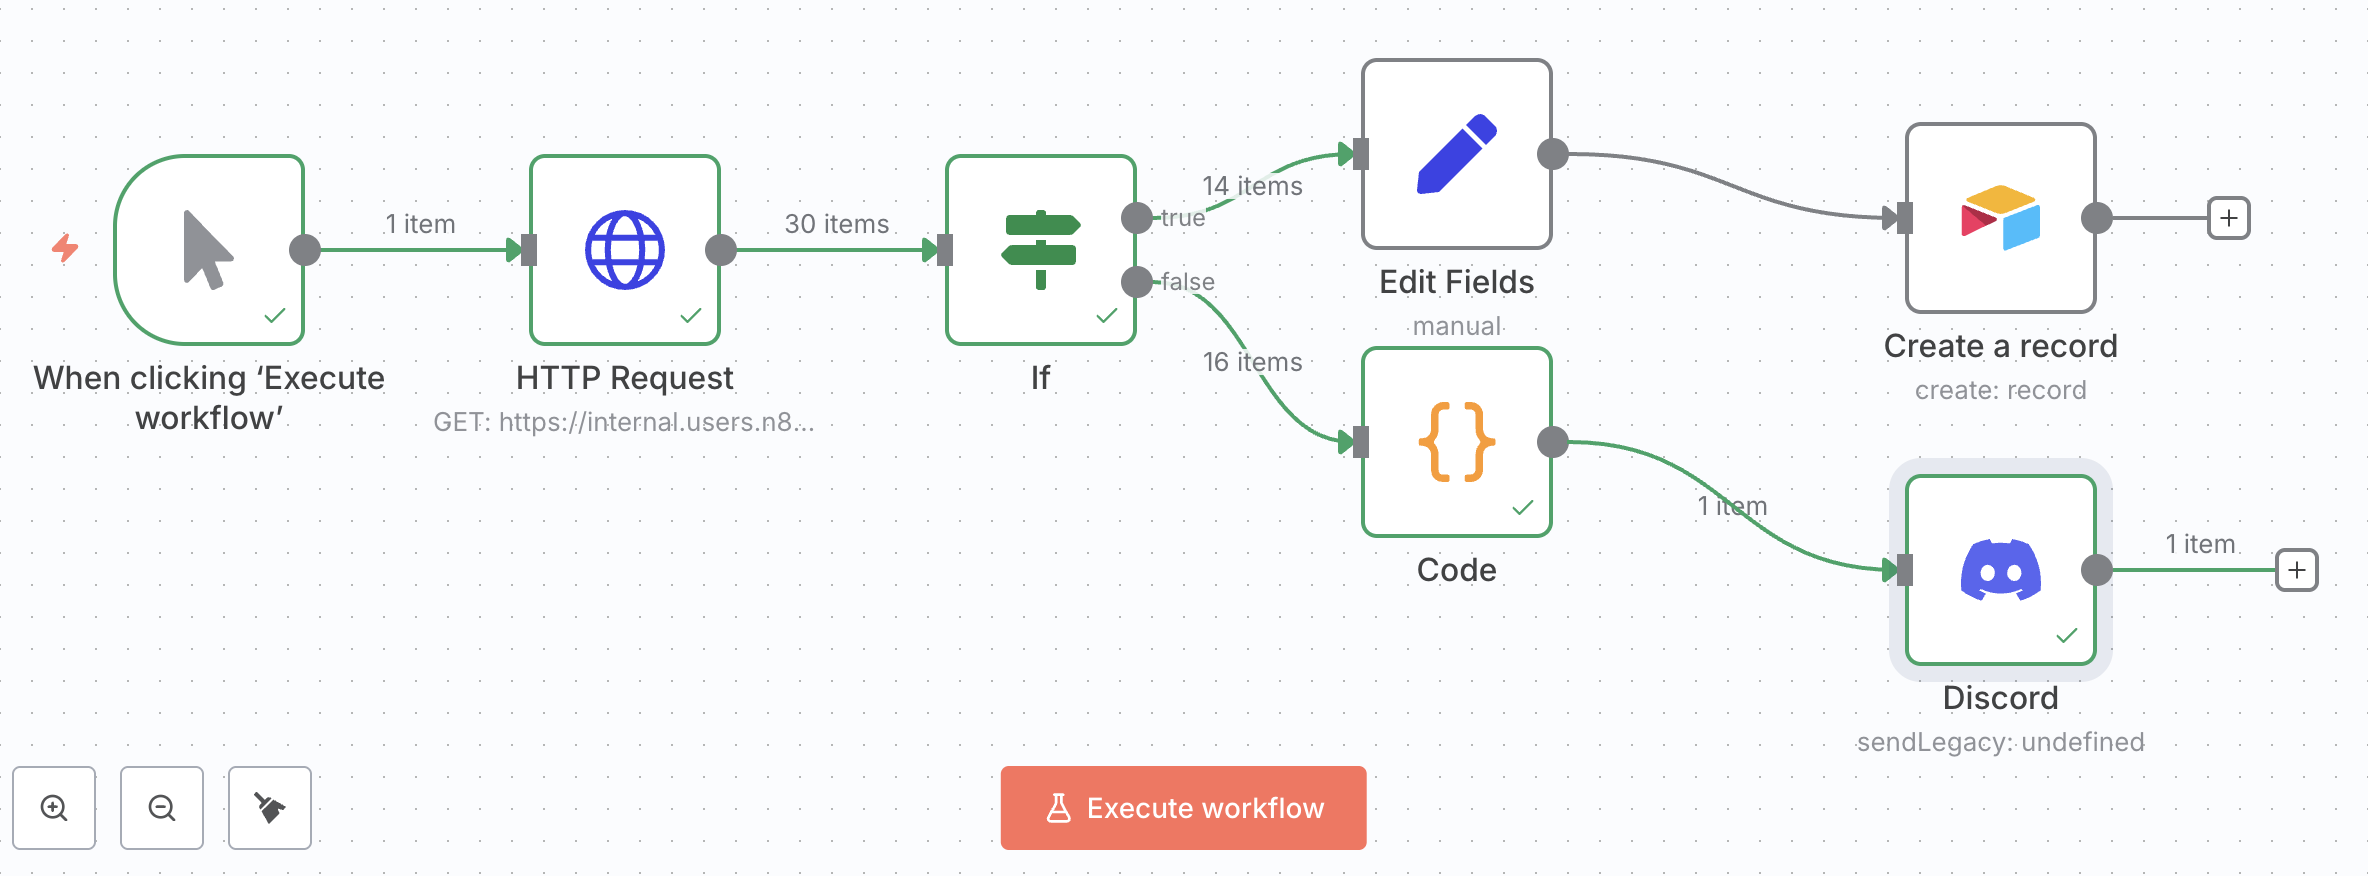
- IfノードがFalseの場合、Codeノードを追加する
- Parameters
- Mode: Run once for all items
- Language Javascript
- Javascript コード
- Parameters
let items = $input.all();
let totalBooked = items.length;
let bookedSum = 0;

for (let i=0; i < items.length; i++) {
  bookedSum = bookedSum + items[i].json.orderPrice;
}

return [{ json: {totalBooked, bookedSum} }];- Execute stepを実行する
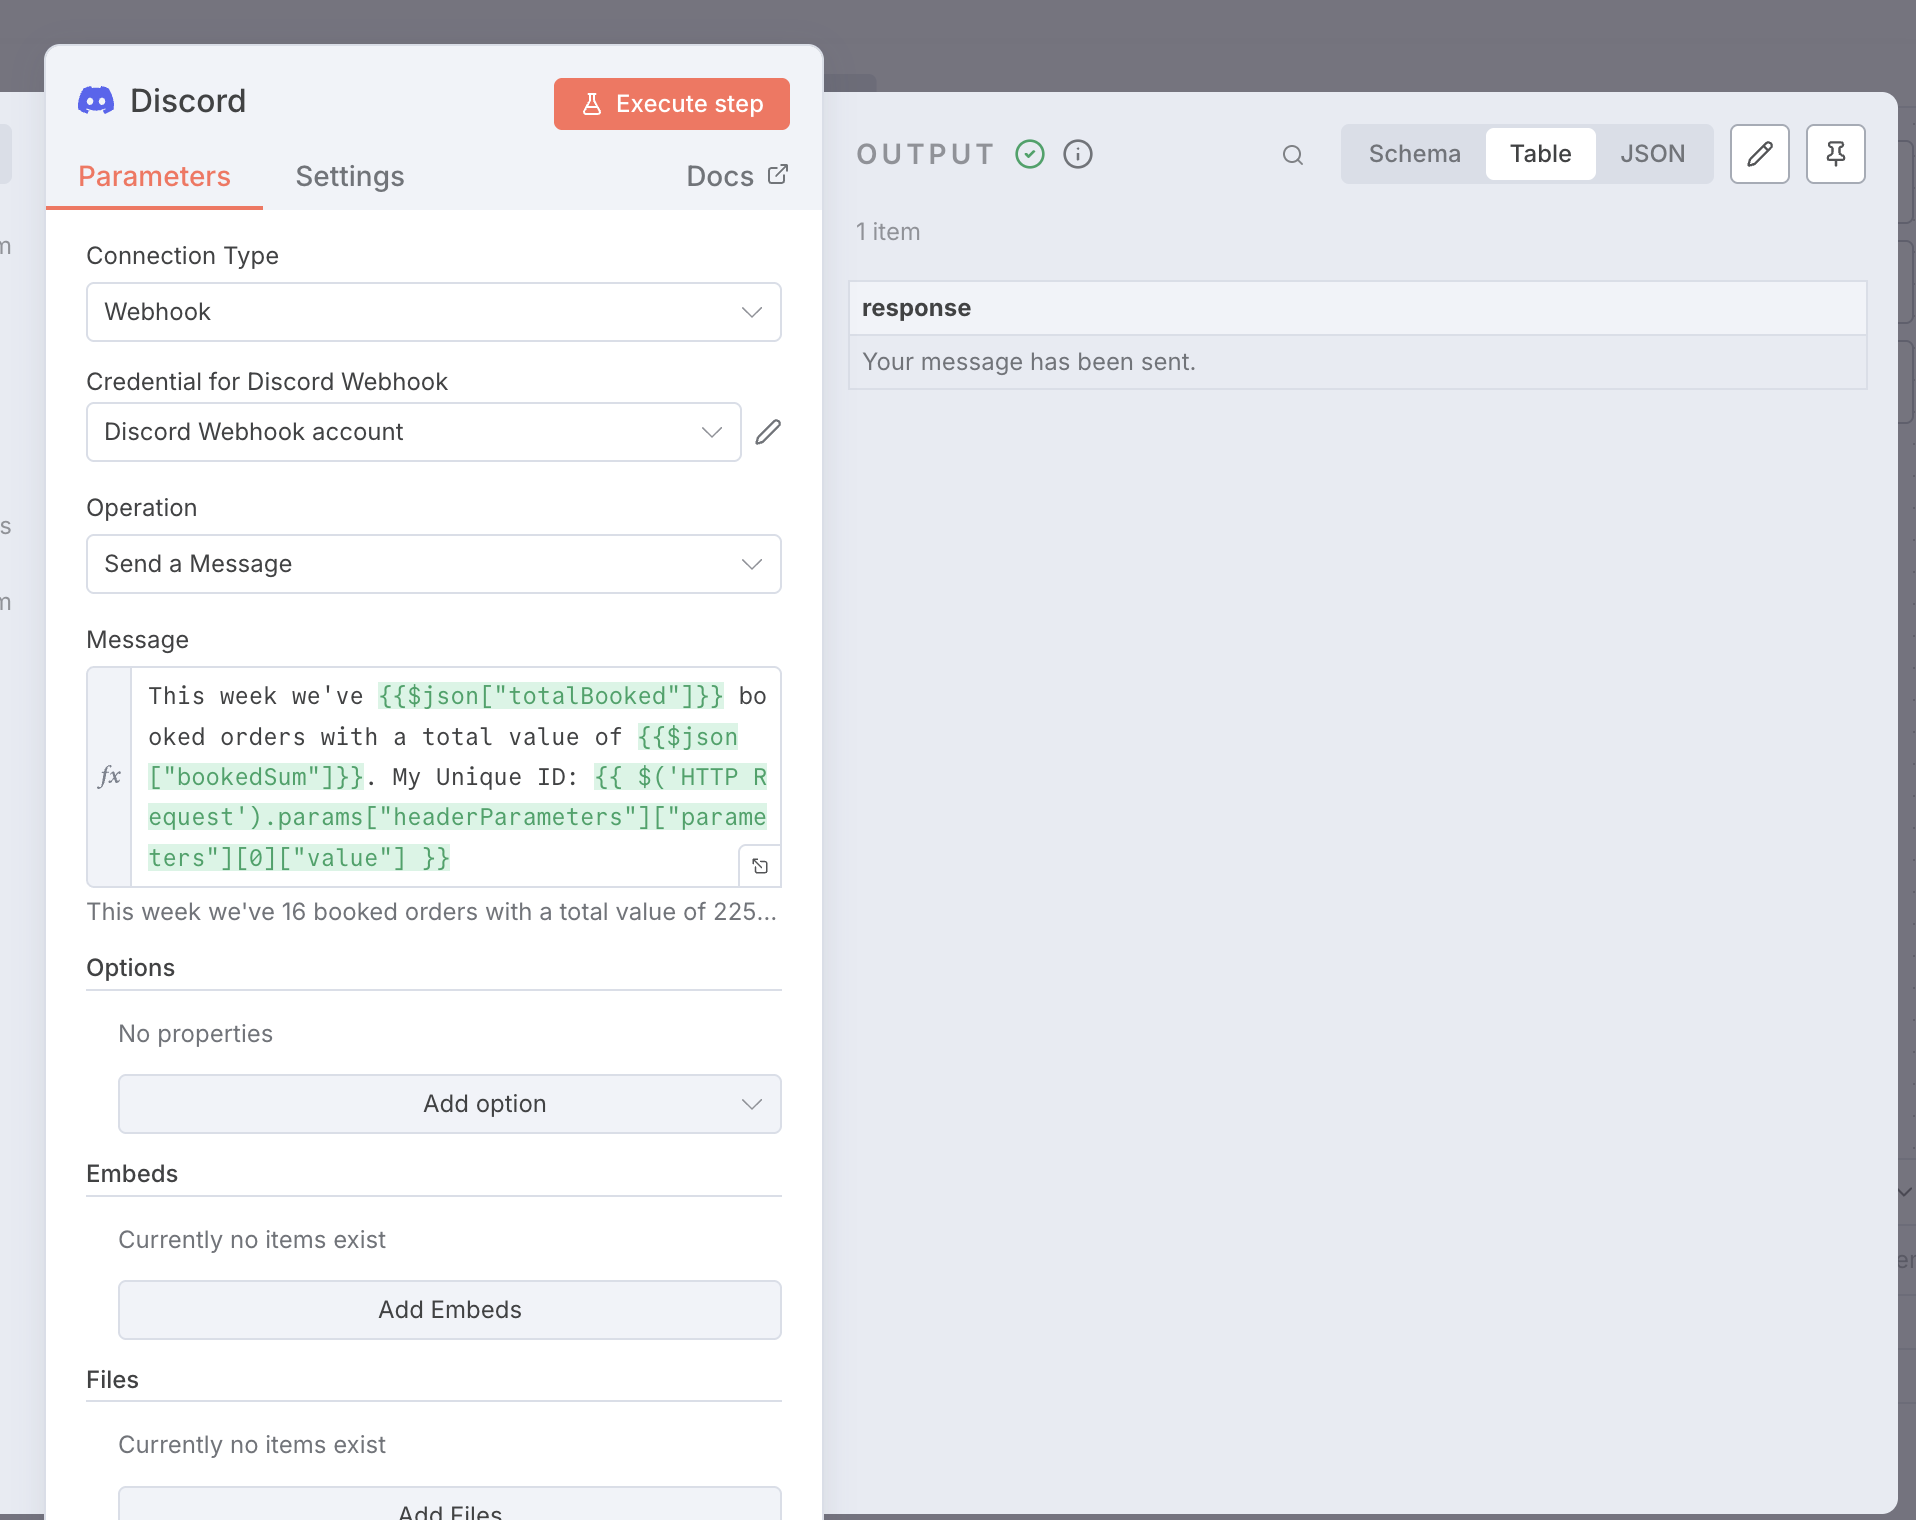
Discordノードの追加
- CodeノードにDiscordノードを接続し、Message ActionからSend a messageを選択する
- Parameters
- Connection Type: Webhook
- Credential for Discord Webhook
- Create new credential
- Webhook URL: *1のWebhook URLを貼り付ける
- Operation: Send a message
- Message
- Create new credential
- Parameters
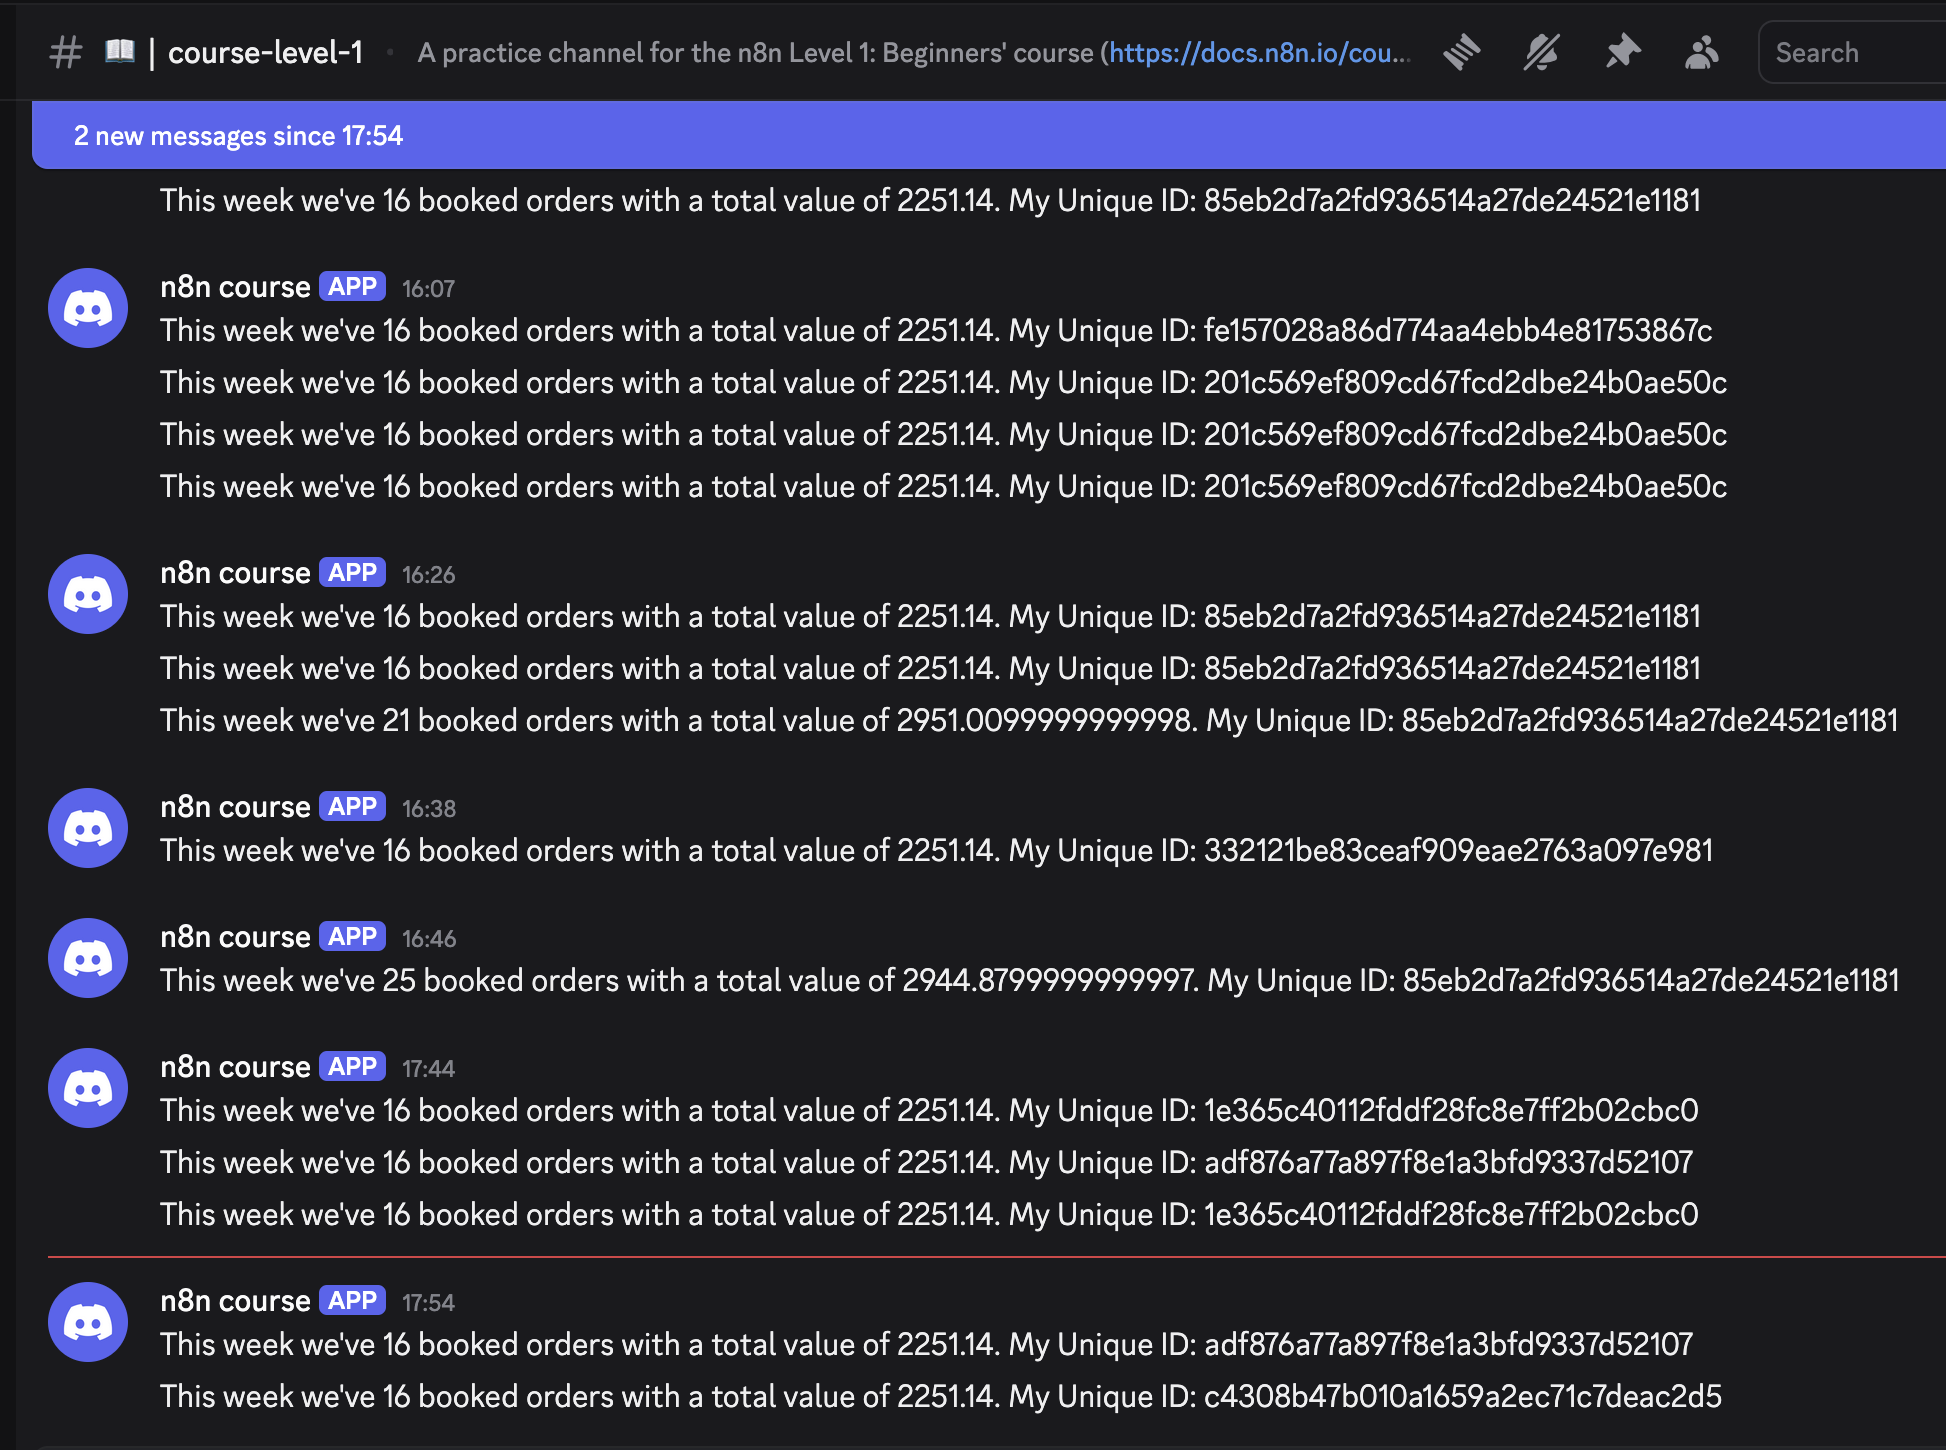
This week we've {{$json["totalBooked"]}} booked orders with a total value of {{$json["bookedSum"]}}. My Unique ID: {{ $('HTTP Request').params["headerParameters"]["parameters"][0]["value"] }}- Execute stepを実行する
- Discordのcourse-level-1チャンネルに、メッセージ(最下部)が送られたことを確認する
Schedule Trigger ノードの追加
- Manual Triggerノードを削除する
- ノードパネルを開き、Schedule Triggerノードを追加し、HTTP Requestノードに接続する
- Parameters
- Trigger Interval: Weeks
- Weeks Between Triggers: 1
- Trigger on weekdays: Monday
- Trigger at Hour: 9am
- Trigger at Minute: 0
- Parameters
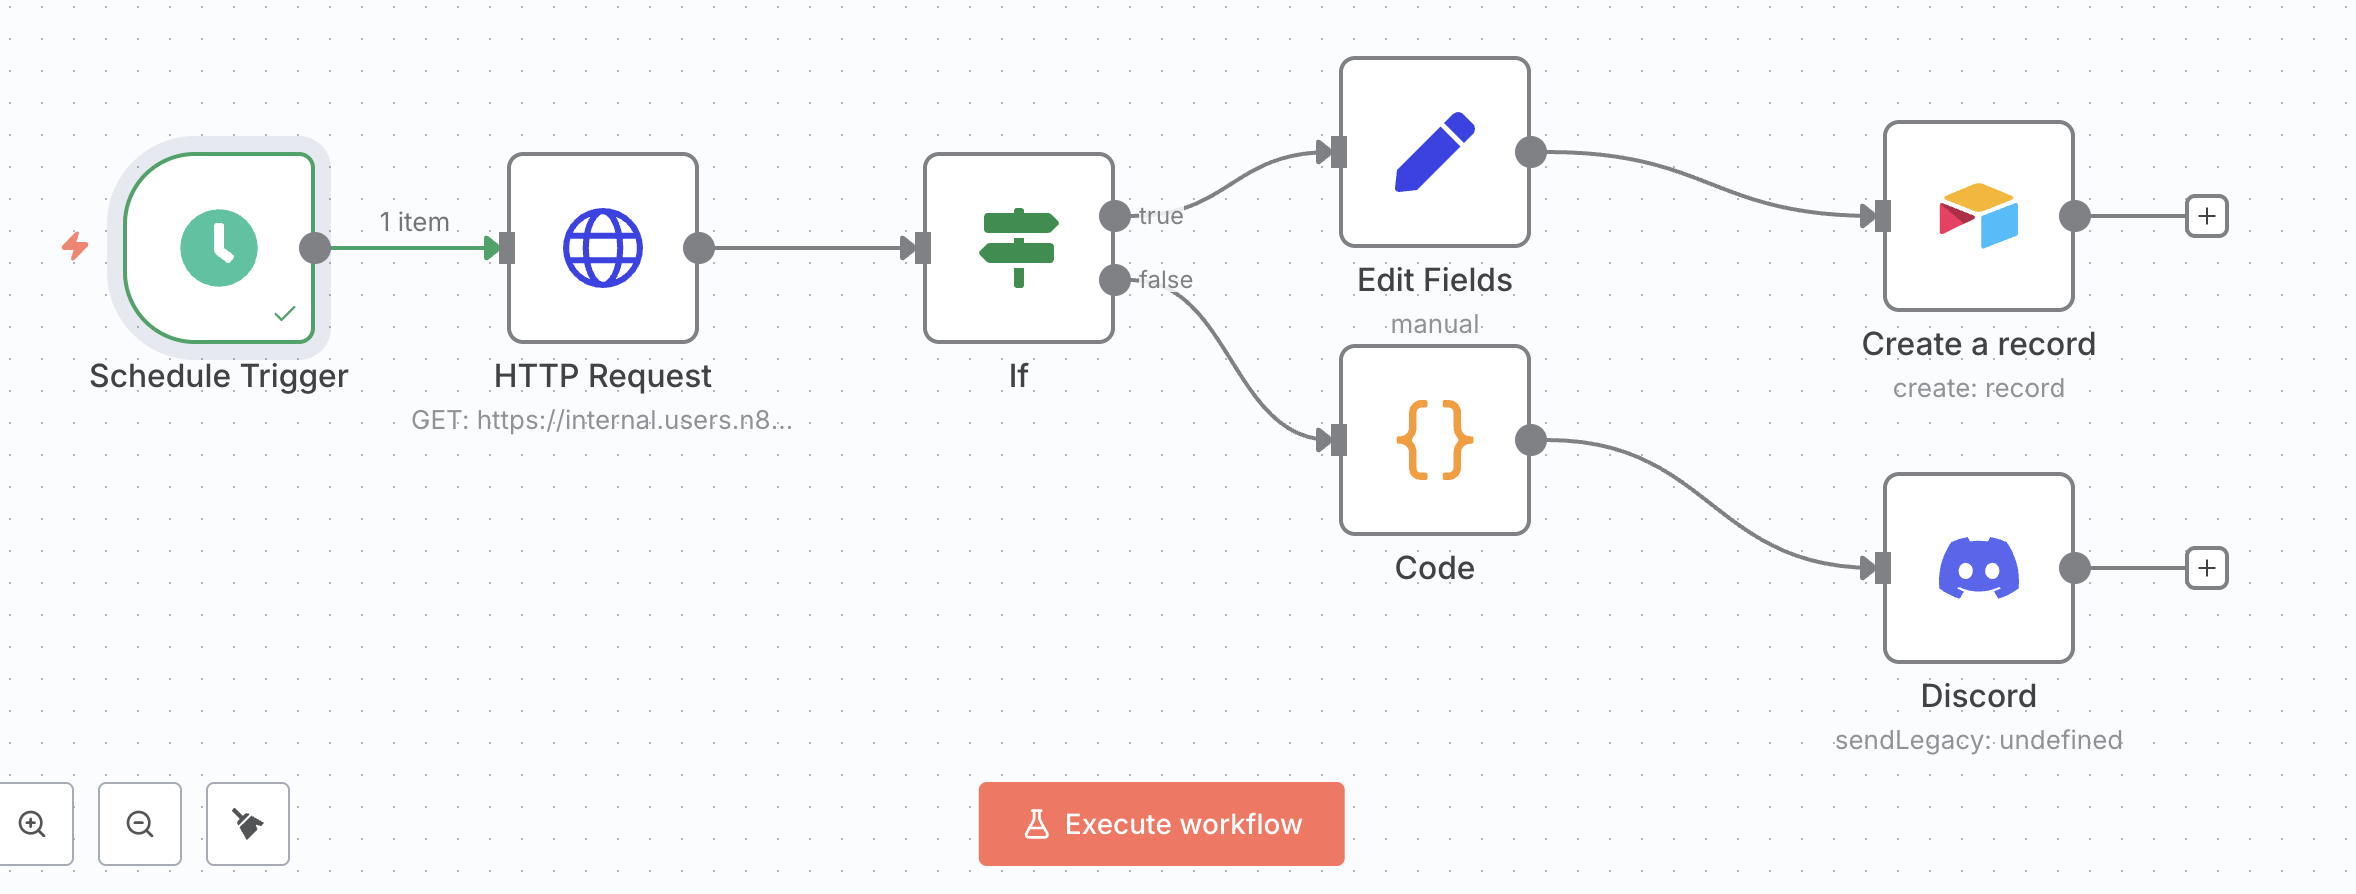
Workflowの実行
- Canvasに戻り、ナビゲーションメニューのactive/inactiveトグルスイッチをactiveにセットする
- Executionsタブを開くと、Execution logを確認できる
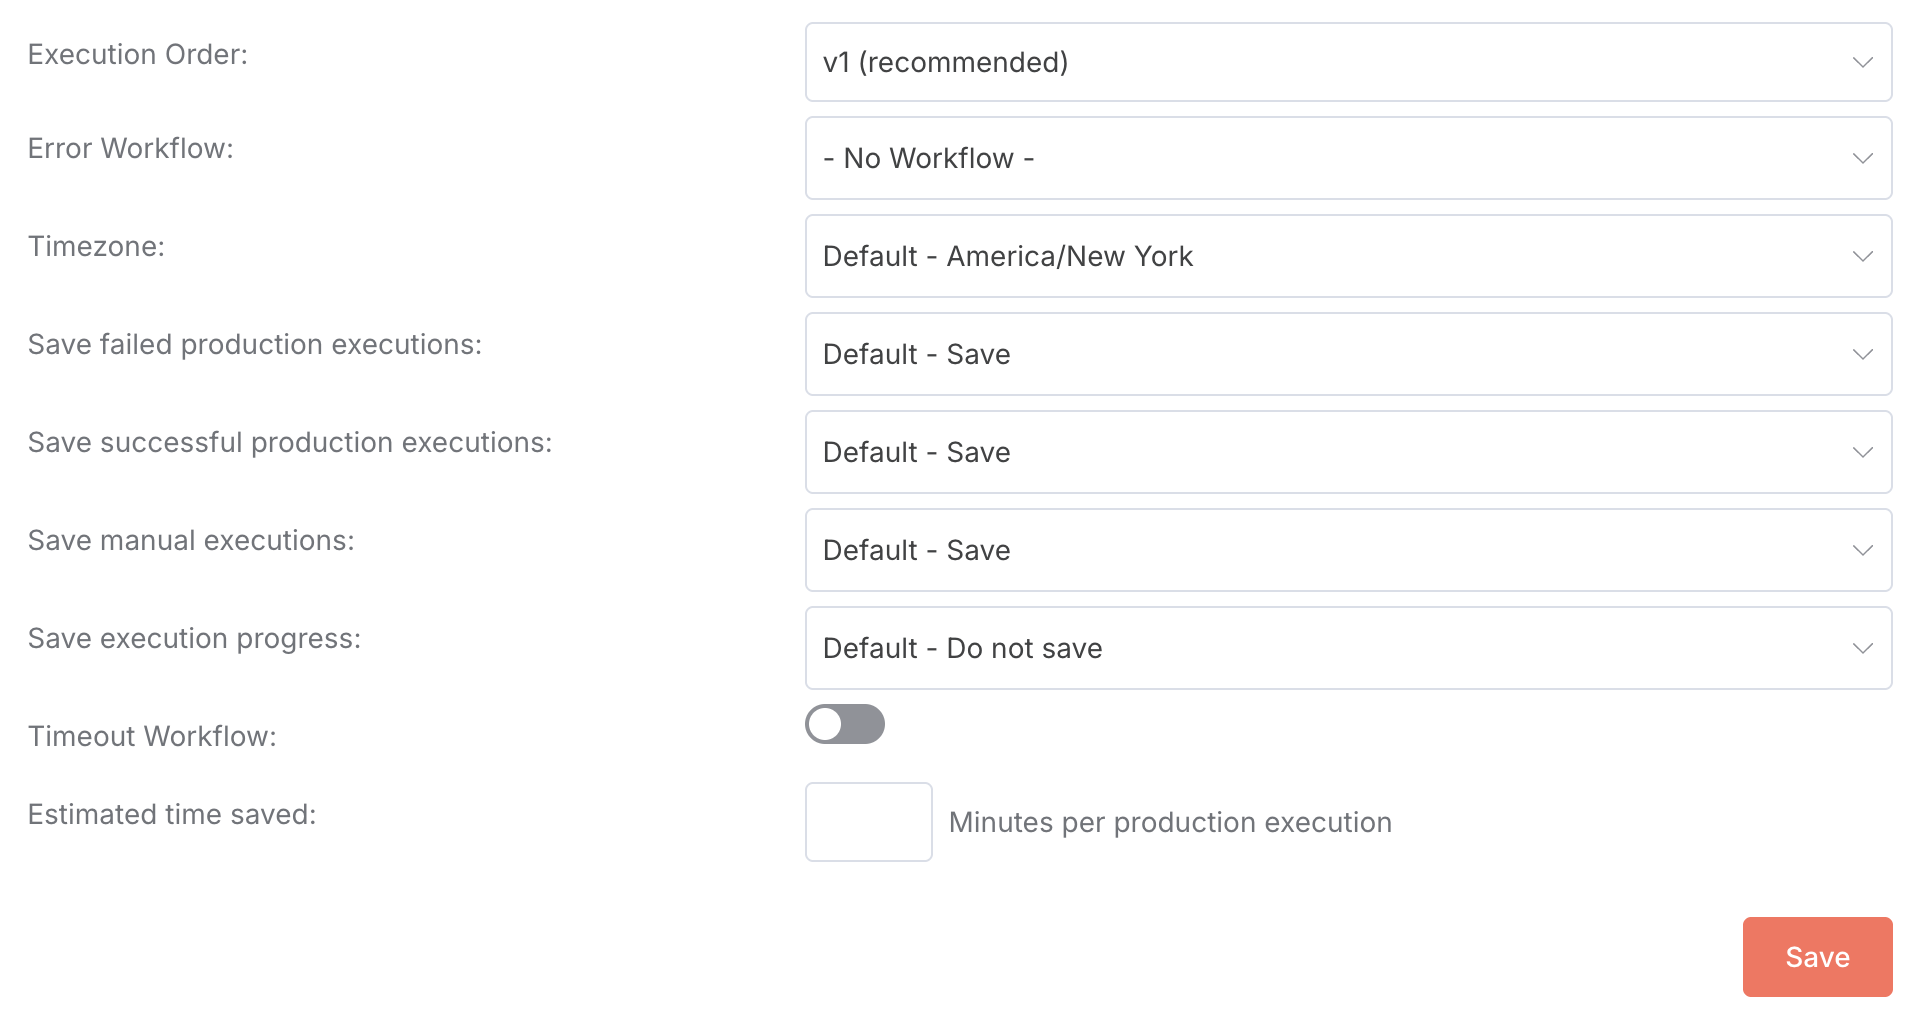
- ミートボールメニュー > Settings からグローバル設定が変更できる