


はじめに
手順にしたがって、Google Cloud Runで、n8nをホスティングする
まず、開発環境用の、メモリが保存されないEasy modeを説明するが、n8nようには、後述のDurable modeを使用しないと永続化できなかった。Durable modeの実行をおすすめする。
手順
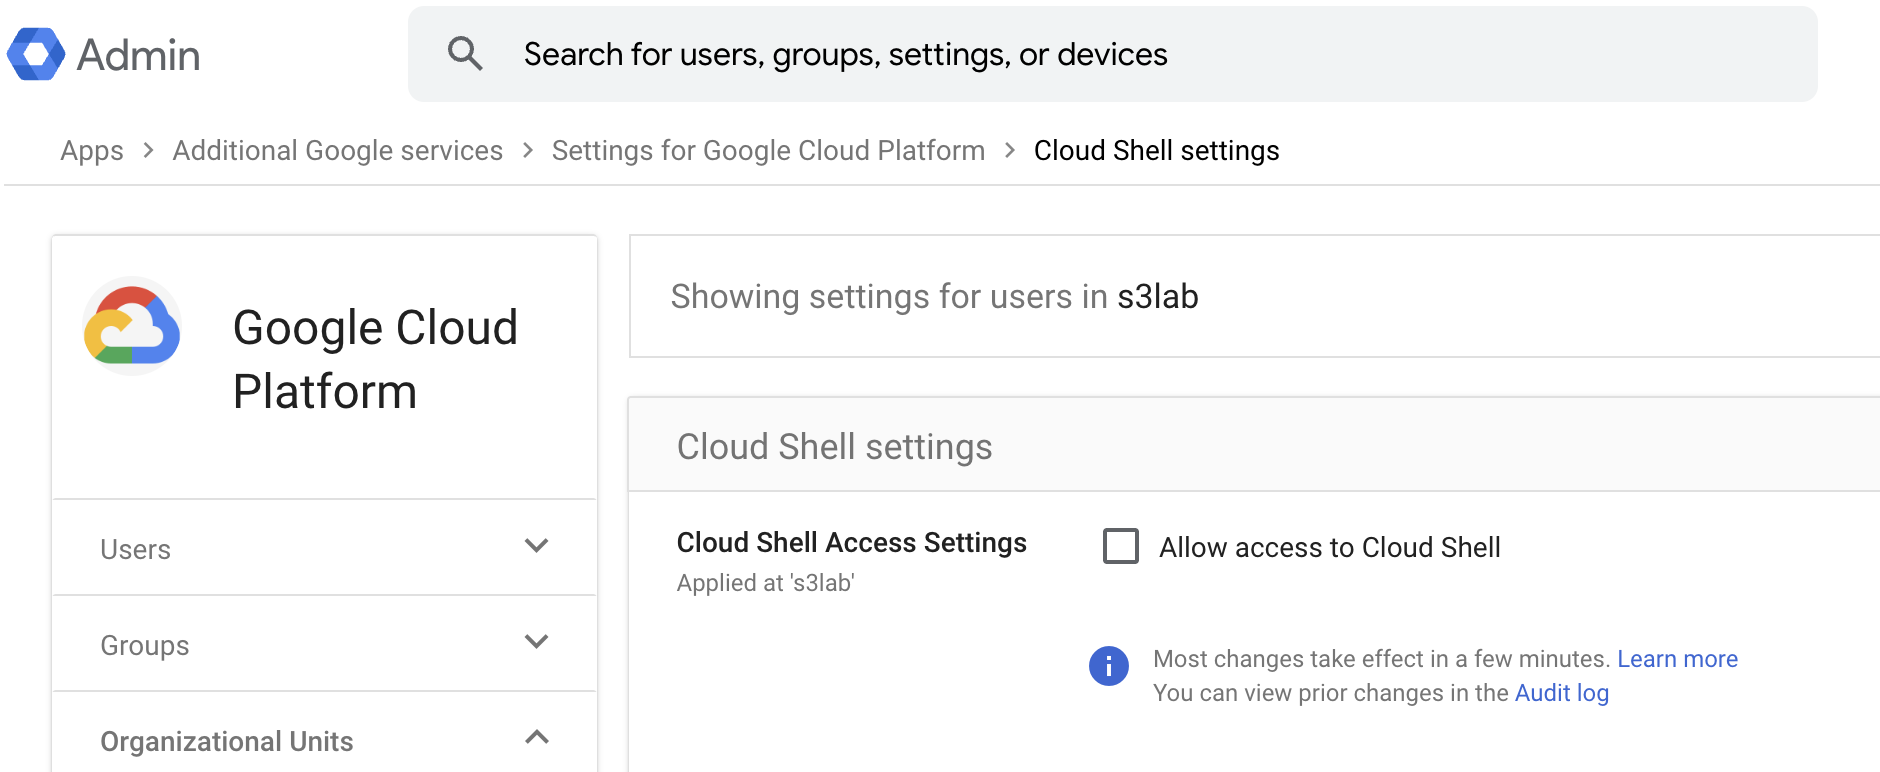
Cloud Shell Access Settingsの有効化
Google workspaceで、Cloud Shell Access Settingsを有効にする
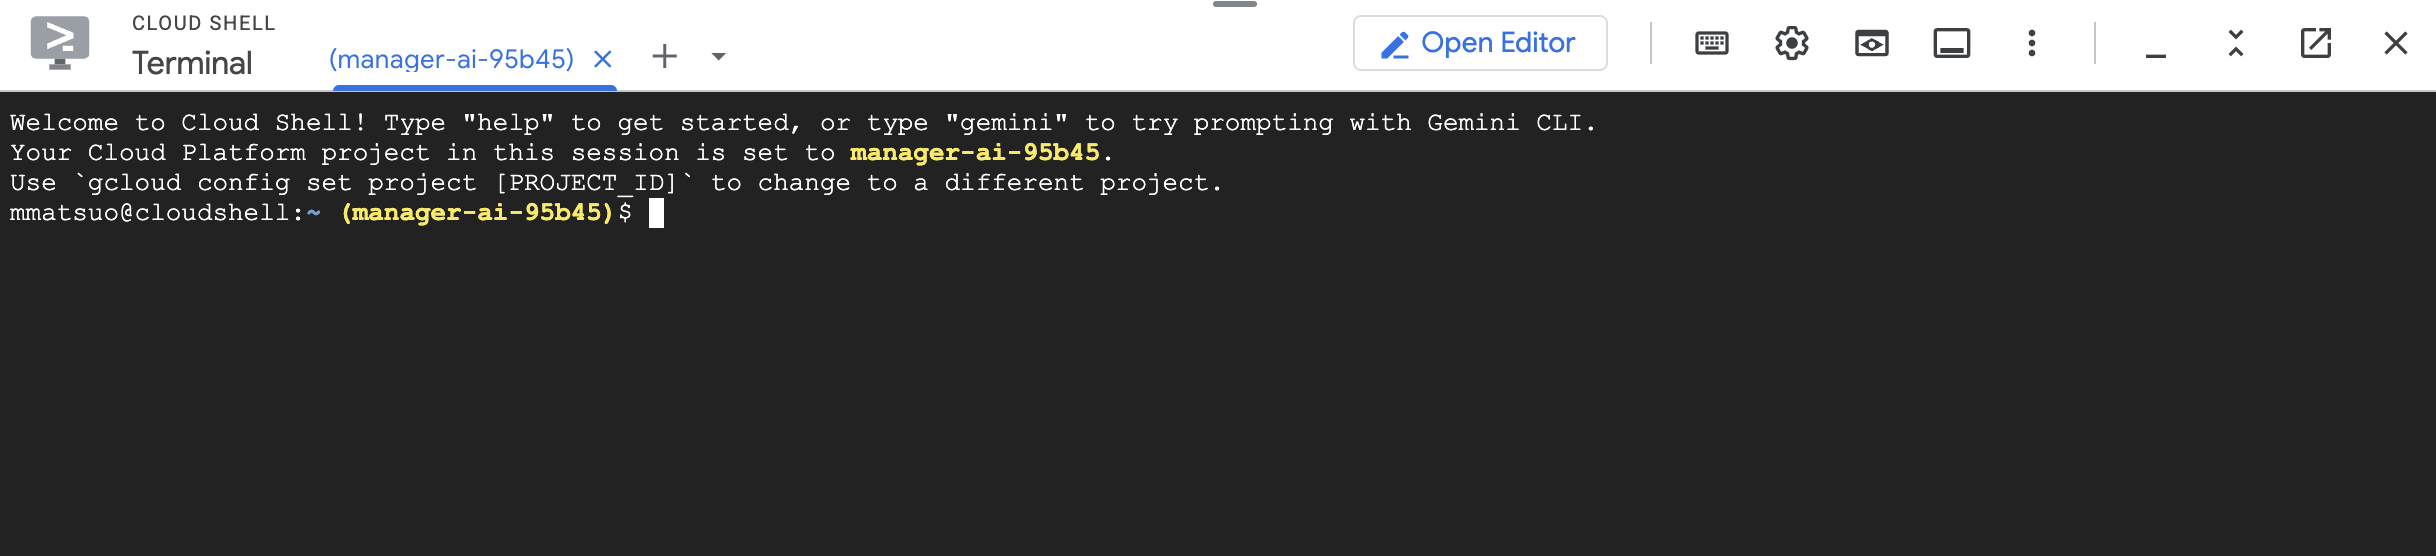
Terminalを開く

Open terminalボタンをクリック
gcloudへログインする
% gcloud auth login

You are already authenticated with gcloud when running
inside the Cloud Shell and so do not need to run this
command. Do you wish to proceed anyway?

Do you want to continue (Y/n)?  Y

Go to the following link in your browser, and complete the sign-in prompts:

    https://accounts.google.com/o/oauth2/auth?response_type=code&client_id=xxxxxx.apps.googleusercontent.com&redirect_uri=https%3A%2F%2Fsdk.cloud.google.com%2Fauthcode.html&scope=openid+https%3A%2F%2Fwww.googleapis.com%2Fauth%2Fuserinfo.email+https%3A%2F%2Fwww.googleapis.com%2Fauth%2Fcloud-platform+https%3A%2F%2Fwww.googleapis.com%2Fauth%2Fappengine.admin+https%3A%2F%2Fwww.googleapis.com%2Fauth%2Fsqlservice.login+https%3A%2F%2Fwww.googleapis.com%2Fauth%2Fcompute+https%3A%2F%2Fwww.googleapis.com%2Fauth%2Faccounts.reauth&state=yyyyy&prompt=consent&token_usage=remote&access_type=offline&code_challenge=zzzzz&code_challenge_method=S256

Once finished, enter the verification code provided in your browser: AAAAA

You are now logged in as [xxxxxx].
Your current project is [manager-ai].  You can change this setting by running:
  $ gcloud config set project PROJECT_ID

cloudshell:~ (manager-ai)$
Cloud run apiサービスを有効化
% gcloud services enable run.googleapis.comEasy mode
コンテナ開始とn8nデプロイ
% gcloud run deploy n8n \
--image=n8nio/n8n \
--region=asia-northeast1 \
--allow-unauthenticated \
--port=5678 \
--no-cpu-throttling \
--memory=2Gi
Deploying container to Cloud Run service [n8n] in project [manager-ai] region [asia-northeast1]
Deploying new service...
Setting IAM Policy...done
Creating Revision...done
Routing traffic...done
Done.
Service [n8n] revision [n8n-00001-42f] has been deployed and is serving 100 percent of traffic.
Service URL: https://n8n-xxxxx.asia-northeast1.run.app
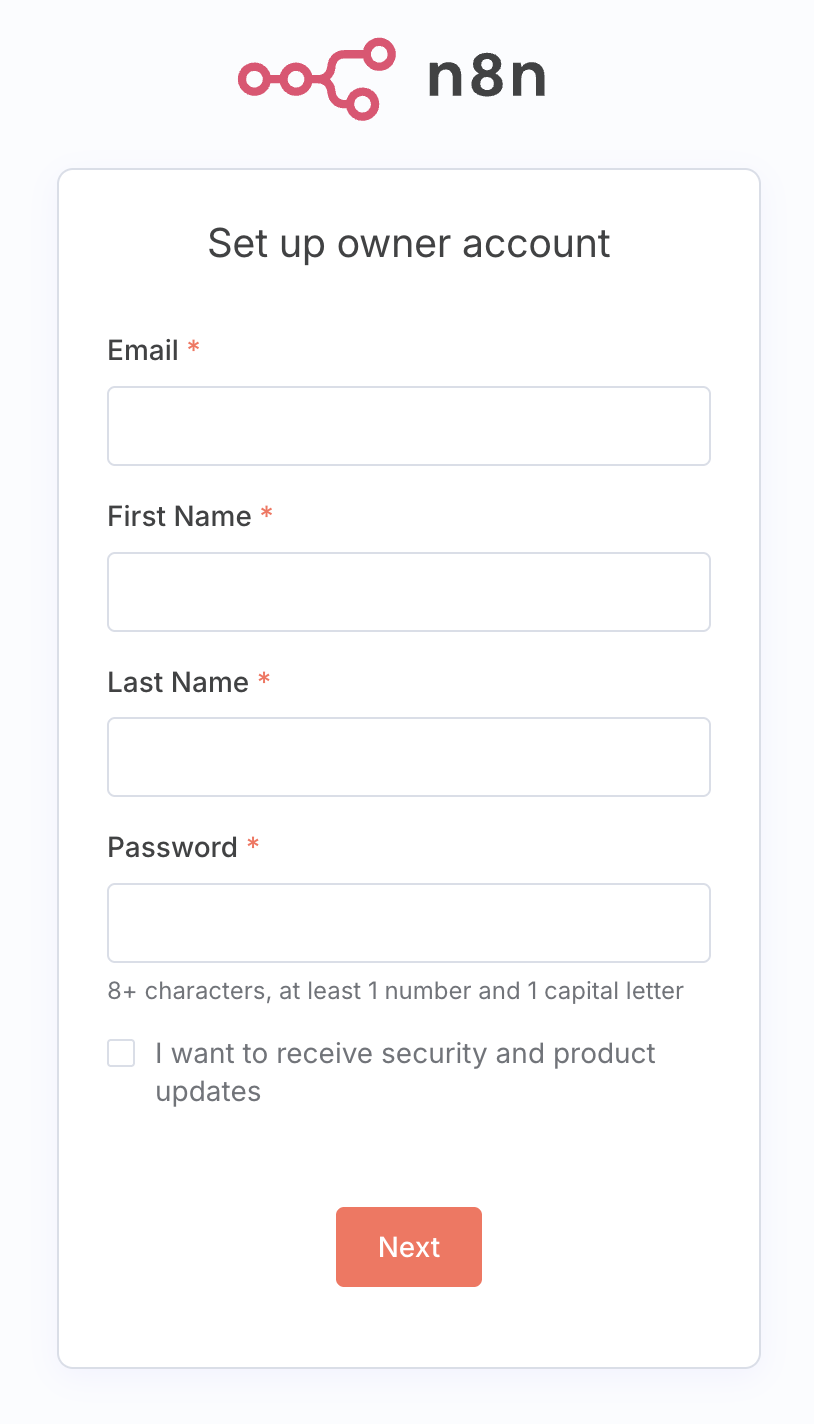
cloudshell:~ (manager-ai)$ n8nアカウントを開く
https://n8n-xxxxx.asia-northeast1.run.app を開く
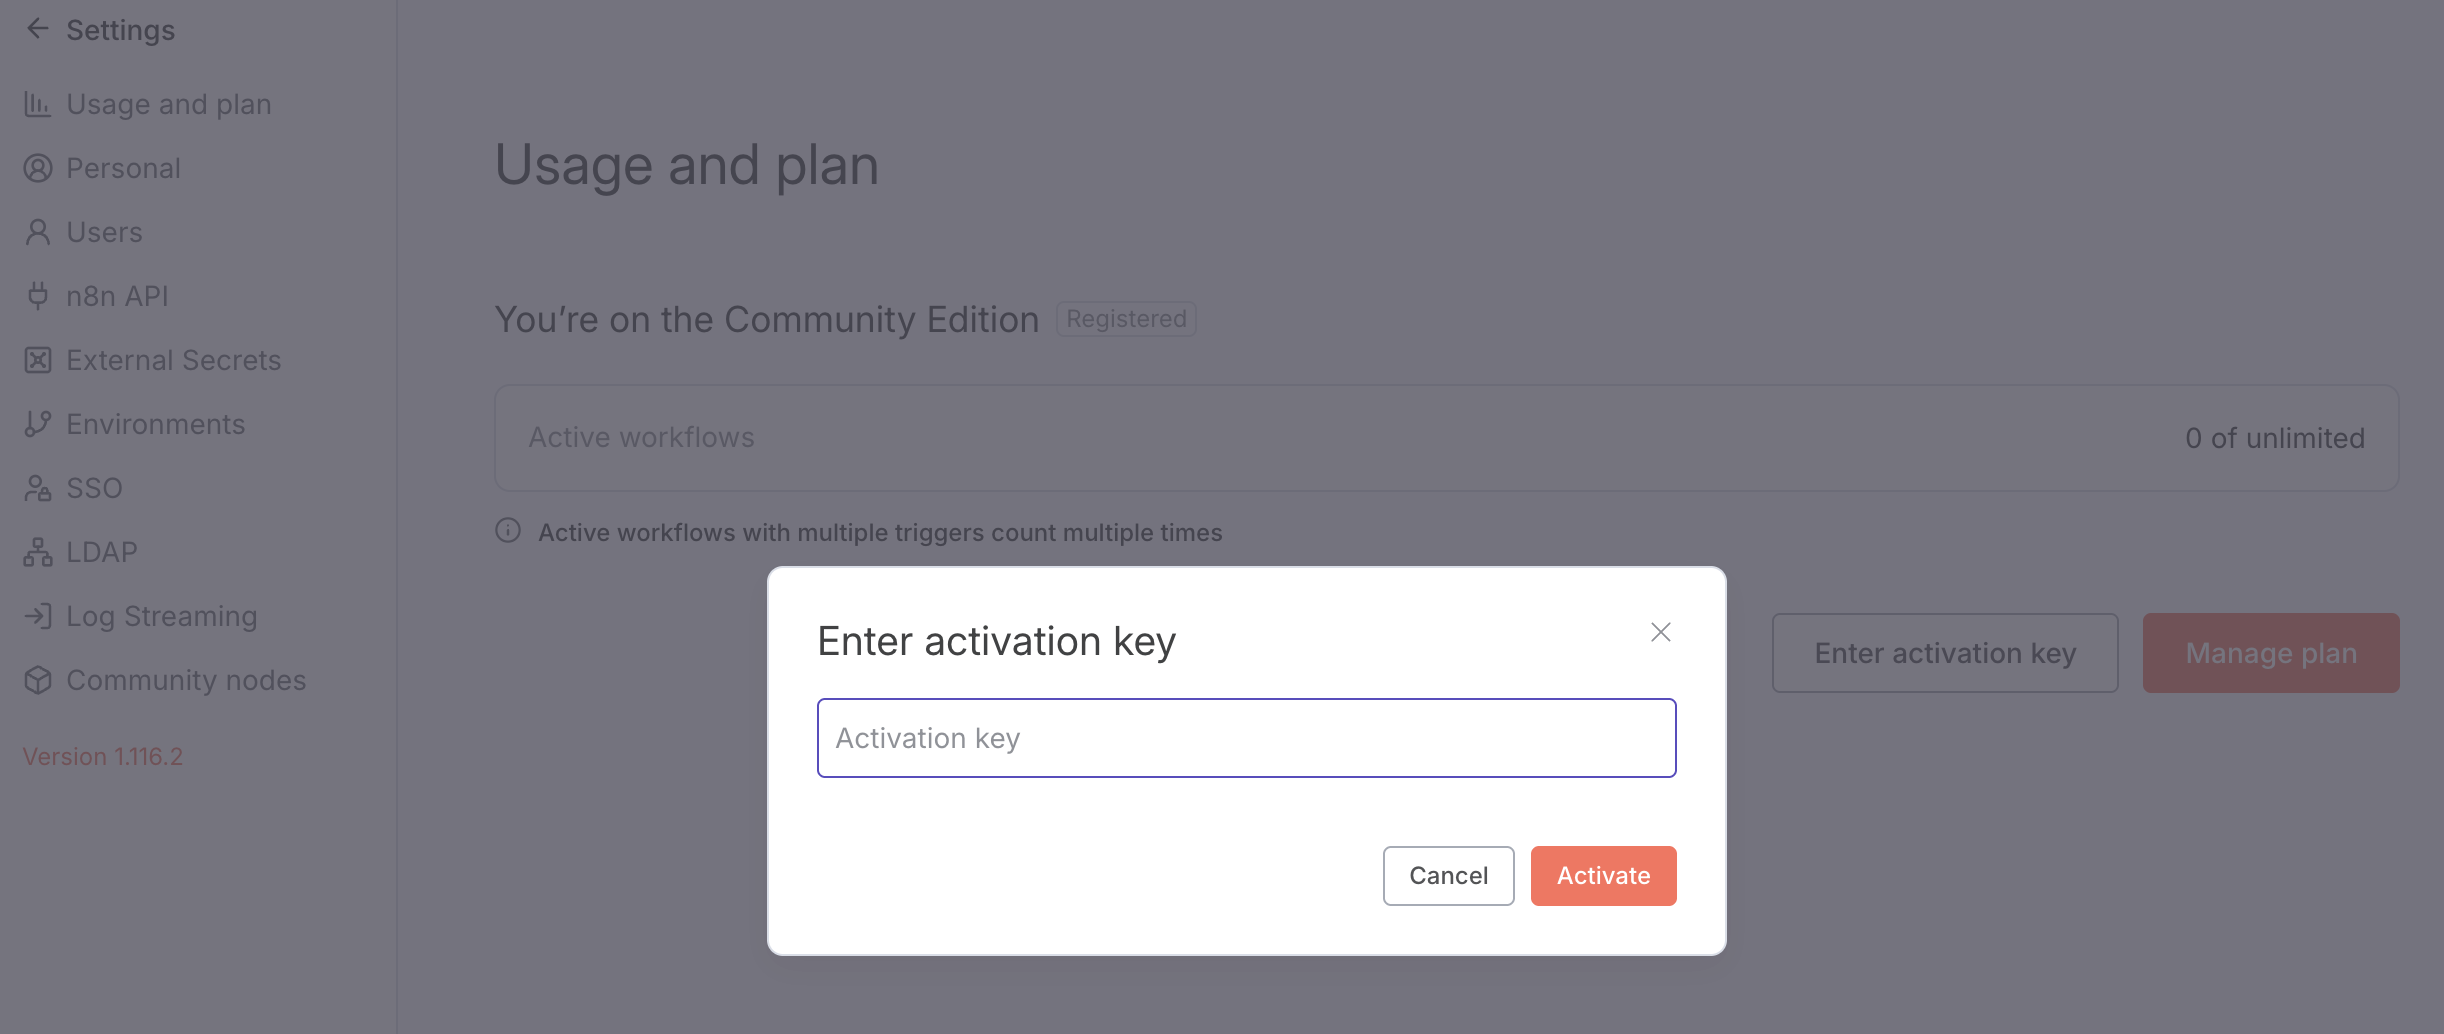
Settings > Usage and planを開き、Activation keyを入力する
Durable mode
Easy modeでユーザー登録しても、しばらくしたらログインできなくなっていた。Durableモードでは、
ワークフロー定義、実行履歴、認証情報、ユーザー、タグ・バージョン・変数などが永続化される。
APIの有効化
## You may need to login first
gcloud auth login

gcloud services enable run.googleapis.com
gcloud services enable sqladmin.googleapis.com
gcloud services enable secretmanager.googleapis.com
環境変数の設定
export PROJECT_ID=your-project
export REGION=asia-northeast1
PostgreSQLインスタンス立ち上げ
% gcloud sql instances create n8n-db \
    --database-version=POSTGRES_13 \
    --tier=db-f1-micro \
    --region=$REGION \
    --root-password="change-this-password" \
    --storage-size=10GB \
    --availability-type=ZONAL \
    --no-backup \
    --storage-type=HDD
n8nデータベースの作成
gcloud sql databases create n8n --instance=n8n-dbDBユーザーの作成
gcloud sql users create n8n-user \
    --instance=n8n-db \
    --password="change-this-password"
Secret managerにパスワードを登録
gcloud secrets create n8n-db-password \
    --data-file=/your/password/file \
    --replication-policy="automatic"

Secret managerで以下を確認
projects/xxxxx/secrets/n8n-db-password
または、以下で作成する
gcloud secrets create n8n-db-password \
  --replication-policy="automatic"

echo -n 'my-secret-db-password' | gcloud secrets versions add n8n-db-password --data-file=-

gcloud secrets versions list n8n-db-password
暗号キーを作成
openssl rand -base64 -out my-encryption-key 42Secret managerに暗号キーを登録
gcloud secrets create n8n-encryption-key \
    --data-file=my-encryption-key \
    --replication-policy="automatic"

Secret managerで以下を確認
projects/xxxxx/secrets/n8n-encryption-key
サービスアカウントの作成
- Secret Manager の
n8n-db-passwordの読み込み権限付与 - Secret Manager の
n8n-encryption-keyの読み込み権限付与 roles/cloudsql.client(Cloud SQL インスタンスへ接続するための権限)を付与
gcloud iam service-accounts create n8n-service-account \
    --display-name="n8n Service Account"

gcloud secrets add-iam-policy-binding n8n-db-password \
    --member="serviceAccount:n8n-service-account@$PROJECT_ID.iam.gserviceaccount.com" \
    --role="roles/secretmanager.secretAccessor"

gcloud secrets add-iam-policy-binding n8n-encryption-key \
    --member="serviceAccount:n8n-service-account@$PROJECT_ID.iam.gserviceaccount.com" \
    --role="roles/secretmanager.secretAccessor"

gcloud projects add-iam-policy-binding $PROJECT_ID \
    --member="serviceAccount:n8n-service-account@$PROJECT_ID.iam.gserviceaccount.com" \
    --role="roles/cloudsql.client"
Cloud runのデプロイ
gcloud run deploy n8n \
--image=n8nio/n8n:latest \
--command="/bin/sh" \
--args="-c,sleep 5;n8n start" \
--region=$REGION \
--allow-unauthenticated \
--port=5678 \
--memory=2Gi \
--no-cpu-throttling \
--set-env-vars="N8N_PORT=5678,N8N_PROTOCOL=https,DB_TYPE=postgresdb,DB_POSTGRESDB_DATABASE=n8n,DB_POSTGRESDB_USER=n8n-user,DB_POSTGRESDB_HOST=/cloudsql/$PROJECT_ID:$REGION:n8n-db,DB_POSTGRESDB_PORT=5432,DB_POSTGRESDB_SCHEMA=public,GENERIC_TIMEZONE=UTC,QUEUE_HEALTH_CHECK_ACTIVE=true" \
--set-secrets="DB_POSTGRESDB_PASSWORD=n8n-db-password:latest,N8N_ENCRYPTION_KEY=n8n-encryption-key:latest" \
--add-cloudsql-instances=$PROJECT_ID:$REGION:n8n-db \
--service-account=n8n-service-account@$PROJECT_ID.iam.gserviceaccount.com
n8nからGoogle WorkspaceへのOAuthアクセス設定
この手順により以下のようなことができるようになります。
- n8n Workflow に Google Sheets ノード を置く
- ノード内の Credentials 欄 →
Add New(または「新規作成」) - 次の画面で Client ID / Secret を入力
- Connect / 認証 を押す
- ここで Google の同意画面が開く → 許可
- 後は refresh_token が保存されるので、自動で使える。
Google Workspace APIを有効化
## Enable whichever APIs you need
gcloud services enable gmail.googleapis.com
gcloud services enable drive.googleapis.com
gcloud services enable sheets.googleapis.com
gcloud services enable docs.googleapis.com
gcloud services enable calendar-json.googleapis.com
n8nサービスの再デプロイ
環境変数は追加・更新される
export SERVICE_URL="https://n8n-xxxxx.asia-northeast1.run.app"

gcloud run services update n8n \
    --region=$REGION \
    --update-env-vars="N8N_HOST=$(echo $SERVICE_URL | sed 's/https:\/\///'),WEBHOOK_URL=$SERVICE_URL,N8N_EDITOR_BASE_URL=$SERVICE_URL"
GCPでOAuth同意画面を作成
同意画面の目的は、ユーザーにブランド情報を含む画面を見せることで、このアプリが安全であることを示すことです。これは、GCPの各プロジェクトに1つの設定です。Externalの場合、Googleが安全性をチェックします。
ユーザーは、アプリにGoogle Workspaceの自分のリソースにアクセスする許可を与えるかどうかを判断できます。
- App Information
- App Name
- Audience
- Internal: Google Workspaceのユーザーのみ利用可能
- External: 外部ユーザーも利用可能
- Contact Information
GCPでOAuth 2.0 Client IDを作成
Clientは複数作成することができ、このClident IDとkeyでアクセストークンを取得し、Google WorkspaceのAPIを利用することができるようになります。
- Type: Web application
- Authorized JavaScript origins: https://n8n-xxxxx.asia-northeast1.run.app
- Authorized JavaScript URIs: https://n8n-xxxxx.asia-northeast1.run.app/rest/oauth2-credential/callback
Data Accessでスコープを追加
- Your non-sensitive scopes
- Google Docs API …/auth/drive.file
- See, edit, create, and delete only the specific Google Drive files you use with this app
- Google Docs API …/auth/drive.file
- Your sensitive scopes
- Google Sheets API …/auth/spreadsheets
- See, edit, create, and delete all your Google Sheets spreadsheets
- Google Sheets API …/auth/spreadsheets
以上で、n8nからGoogle Workspaceを操作できるようになります。